December 23, 2018

Weight Loss Plans for the New Year


Last year, I was so sure that I was done with ever making another "New Year's Resolution" to lose weight. I know it's cliché, but I really do love the idea of starting fresh in a new year--even though it's just another day on the calendar. (Throughout this post, I'm including a photo from January of each year that I started blogging here in 2011)

me in 2011


I've always loved setting goals, but they seem extra special when it's time for a new year to start. That said, it totally contradicts my post about "Waiting until the new year". If we make changes that we're willing to live with forever, then we shouldn't have to wait until January 1 to start. Regardless, there is something motivating about that first day of a new year.

me in January 2012, on my 30th birthday

And now, being the highest weight I've been in eight years, I am starting to feel a little panicked. I thought it would work itself out, like it usually does when I pick up some weight, but I am just having the hardest time getting the scale to budge.

Me in 2013, on my 31st birthday

Last year, I was doing great with my own little combination of intuitive eating and eating only at certain times of the day (8, 12, 4, and 8). It was a year ago that things started going downhill and my weight started going uphill. I was REALLY worried about Jerry, and I focused more on that than I did on anything else.

Me in 2014, during Runner's World photo shoot

Recently, I tried the experiment with intermittent fasting. While I really liked it (mentally, it really helped me to stop thinking about food all the time and it felt easy to do), I didn't lose a single pound. I may have been overeating, but I didn't want to count calories AND fast. I was hoping the fasting would be an alternative.

I've lost a lot of the intuition that I'd built last year, so intuitive eating (by itself) just isn't working anymore. I definitely don't want to do Weight Watchers, or Keto, or any of the other "diet" plans out there. So, I've decided to go back to what has worked so well for me in the past--counting calories, and nothing else.

Me in 2015, after Becky presented me with my race t-shirt quilt

When I dropped 40 pounds pretty quickly in 2015-2016, I was simply counting calories (along with training for the 10K). I made the calorie counting work in a way that fit into my lifestyle. I didn't worry about what food I was eating (I ate what I wanted most) and I ate four times a day (8, 12, 4, and 8). I kept my portions moderate. And I felt good!

Me at nearly my thinnest in 2016

Counting calories is something I know well, and I know that it works for me. I don't feel deprived while doing it, and there aren't any "rules". The biggest drawback (for me) is portioning out food, especially while cooking.

My solution for that is to relax a bit. I don't have to measure things right to the gram. If I don't know how something is prepared, then I just look up something similar and count that. As long as I'm eating moderate portions, my calories will be in check. (I wish I could do the moderate portions while NOT counting calories, but I haven't mastered that yet.)

Me in January 2017, hoping to appear thinner than I was

I'm going to use my Fat Secret app to keep track of my calories. (Funnily enough, as I was looking up that link, I found this post that I wrote in April about my plan to get back to my goal weight. We'll see if I'm any more successful this time! Haha). I also like a paper copy, so I'm going to do the old school tracking method, too.

I'm not going to make any claims just yet about running and if/how/when I'm going to get back to a routine. Each time I think I'm ready, something happens that I just stop doing it. Lately, it's been working on the home remodel. I've spent every spare minute working on that. Other than the island countertop and the flooring, we are pretty much done (aside from just a few minor things that aren't on a time crunch).

My sister's weight is up a bit, too, and she asked me if I'd want to start exchanging our food logs each day. It sounds simple enough--we've done this in the past for accountability--but it really does help. When thinking about my food choices, I remember that I'm going to have to write it down and send a picture to Jeanie. Not that she's judgmental, but there is something about sharing things like that that makes us feel vulnerable. And that can be helpful!

Me on treadmill in January 2018--starting to gain weight

I'm going to Phoenix on January 25th (my birthday!) and I'd love to drop some weight before then. Ambitiously, I think I could lose about 10 pounds (the first five will come off quickly due to water weight). But, I would be happy just to get back in the 150's.

I'm not going to wait until New Year's Day to start. I don't have much going on--my family is coming over on Christmas morning, and we're just having a simple brunch. And then on the 28th, I'm having my childhood friends over. I'm going to make Wendy's Chili for that, which is pretty healthy and SO good. I actually feel pretty good about getting started! I'm tired of thinking about it and not doing anything about it. I need to read Andrea's advice about "Just get it over with!" again ;)  (Seriously, check out that post--it makes so much sense!)

I don't have any current photos of me, because I've been avoiding the camera like the plague. (Just now, I took a selfie--see below--no make-up, gray roots, and all.) I am going to take some current photos this week because I need to quit avoiding it--avoiding it doesn't make it go away.


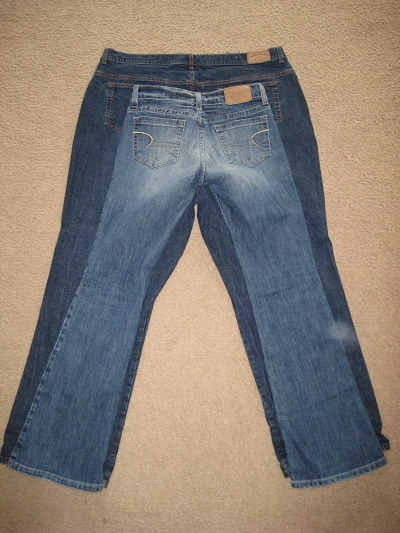
So, I will face the camera, pick out my first pair of "milestone jeans" and then get to work. (I've been debating whether to post Wednesday Weigh-ins again every week. I love the accountability, but it is a very vulnerable thing to post, especially when things aren't going well. So, I'll think about it some more. Regardless, I'll share my progress now and then.)

Merry Christmas, everyone! (Or Happy Holidays, if you don't celebrate Christmas!)


December 18, 2018

The Story of DIY'ing Our Kitchen Island (so exciting, right?!)

DIY kitchen island

This is long and boring, but in case you are interested in everything that went into this island (which still isn't finished!), I'll write it all out here. I saved this for its own post, because it's been--well, I don't want to say frustrating, because I am excited about finishing it--but it's been a process getting to this point. And finishing it is going to be a challenge!

When we first started working on the kitchen, I knew that I wanted to do something different with the island. We have a large space between the island and the other side of the kitchen (where there is a sliding glass door to go outside, and the pantry, and laundry room). We've had our dining room table there for years, because we used the actual dining room for the treadmill and bookshelves.

I was never been able to come up with a solution for the treadmill. When the boys shared a bedroom, we had the treadmill in the spare room. I knew I wanted to use the dining room area for an actual dining room and move our table and chairs there.

The solution we came up with was to put the treadmill in the living room and the couch in front of it. Since we got rid of the huge sectional, we were able to make this work. It shortens up the living room a little, which I actually prefer. It's cozier this way. Below, I was taking a photo of the couch, but you can see the treadmill behind it. It kind of blends in to the background, especially considering the bright orange couch right in front of it:


So, by moving the treadmill to the living room and the dining room table to the dining room, we will be left with a large open space in the kitchen where we've kept the table. I decided that I wanted to extend the countertop of the island to be about twice as long and put legs on the end. Then we could add a couple of bar stools at the end of the countertop.

The island that we had was very poor quality, and I knew it wouldn't hold up to a super heavy countertop. So, I decided to reinforce it by adding some framing here and there. But once I started taking it apart, I realized I might as well just rebuild the whole thing with better materials.

And I did! I was intimidated by the whole thing, and I researched the heck out of beforehand. It ended up being one of the easiest projects I've done. I had it put together in about four hours (minus the countertop). (You'll have to imagine this with different flooring. This is linoleum and we are going to replace it with dark gray vinyl planks. Since we're replacing it, we didn't make an effort to protect it from paint, and that's why it looks so bad!)


I actually made the countertop before making the island. The countertop is 92 inches! We weren't sure how we were going to finish it, though--put the same laminate down as the rest of the counters? Or something different?

That decision was made for us when I accidentally cut the laminate sheet wrong (yet another mistake for my upcoming post about "What NOT to do when making over your home"). We would have to order another piece of laminate if we wanted to make the counter to like the others. The laminate isn't super expensive, but they charge $24 shipping (a mandatory fee--there is no option to ship to store for free). So, it would've been a lot for just one piece of laminate.

First, we cut down the island a little so that it was 25" wide instead of 28". That way, we could still apply the laminate that I'd cut too narrow. However, we didn't have enough laminate for the sides. So, we figured we could add wood trim on the sides to finish it instead of using laminate.

I don't have a miter saw, and creating mitered corners for the trim was challenging. They would have to line up perfectly. THEN, we (Jerry was helping me with the framing because it was so large) had to screw the frame on so that the top of the frame was flush with the countertop. I had Jerry hold it flush while I screwed it together. And not surprisingly, we couldn't get it flush--the drill would move the screw just a tiny fraction so that it didn't line up.

It's hard to tell in the photo, but the laminate came up above the trim just a touch, so it wasn't flush. Also, the mitered corners didn't fit well together--mostly on the other side that you can't see in the photo.


(I still wasn't frustrated, though! I wanted to come up with a good solution...)

After ruining some of the trim by making it a hair too short, I found a new solution--put tiny little posts on the corners and avoid mitering altogether. I used the Kreg jig to make the frame, and then we placed it over the countertop, and it fit! (I will explain below why the edge has a lip on it)


Then, it hit me. A solution that involved something I've always wanted to try making: a penny countertop (or, in our case, nickels--because they would match the kitchen better than pennies). For this, you create a lip around the counter (which you can see in the photo above), and then glue down the nickels.

Here is a photo of someone's penny countertop bar:

penny countertop bar
Photo Source

Then, you pour countertop epoxy over the whole thing. And when it cures, it's a perfect countertop that is as hard as granite.

To do this, I shifted the frame up so that it was 1/4 inch taller than the countertop, and carefully screwed that in (thankfully, we got it right on the first try). Then, I primed the entire countertop and trim with oil-based primer. Twice. After that, I painted the countertop and inside lip of the trim orange, and I painted the trim itself white. The orange wouldn't show too much, but it would peak out through the nickels a bit.

After two coats of paint, I was really liking it! I ordered the epoxy and then saw on the website that if you're coating a surface with oil-based paint, you need to put on at least three coats of oil-based polyurethane in order to make sure the epoxy doesn't separate over time.

So, I added three coats of polyurethane. And I thought it made the countertop look even better, actually. If the 1/4" lip wasn't on it, we could have just left it as it is. (It was still very wet in the photo below--the color lightens a little when dry)


When that was dry, I was ready to add the nickels. I thought it would be fun to include other silver change as well--some 50 cent pieces from when I was kid, Susan B. Anthony dollars, the quarters from all 50 states, etc. I tried laying it out, but discovered 1) We severely underestimated how many nickels we'd need, and 2) The different sized change made the layout look weird.

I removed all of the change except for the nickels, and arranged them so they were butted up against each other.


I liked the way it was looking, but after arranging about $50 worth of nickels on there, it wasn't even 1/4 of the way covered!


And that is what it looks like now. Thankfully, I hadn't glued down the change--I wanted to lay it out before gluing. Then we had to decide if we wanted to buy more nickels or come up with another idea. I thought and thought about it, and I came up with a pretty fun idea. We are still going to use the epoxy, but instead of nickels, we are using something else that is practically free of cost. And definitely more fun. I'll wait to share that after it's done because I don't want to get talked out of it. ;)

Now, the challenge is the epoxy itself. The epoxy must cure in a space with air temperature of at LEAST 75 degrees--preferably higher. For 72 hours! Considering it's Michigan winter, we are using our furnace and have it set at 68. We will ROAST if we set the thermostat at 75-80.

We've been working on a solution to close off the kitchen and use a space heater to make just the kitchen itself 80 degrees. The other option would be to wait until summer, when it's super hot outside anyways. That's a long time away! The countertop will actually work until then if we need it to.

So, that's the long story of our island. I hope that when all is said and done, we will love it. With the other projects, even with the mistakes here and there, I've really loved how they turned out. And considering it's all DIY, I think it has character!


December 16, 2018

Trying My Hand at Upholstery (Spoiler: It did NOT go as planned)

Trying my hand at reupholstery

Always sounding like a broken record: I can't believe it's been so long since I wrote! And it's almost Christmas?! When did that happen?

Time has been flying by, and I feel like every spare moment I've had over the last four months has been spent doing something for our home makeover. I don't have a huge update, but we had a couple of fails that I thought would be entertaining to write about (at my expense, haha). Actually, we have had a lot of things go wrong during this whole renovation, so I'll probably make a whole blog post about it when we are done: "What NOT to do when making over your house".

As it stands now, the things we have left to do are:

*Finish the kitchen island (which I'll write about in another post)
*Choose and install the flooring (the expense is holding us back right now--we have to save up a bit to buy the flooring, because I refuse to go into debt again).
*Paint and install molding on the floor (which has to be after the flooring, obviously)
*Slowly replace living room furniture (we've gotten a couch and chair, but now I'm looking for a small couch/love seat and some end tables... I'm planning to buy these things used, so I've been looking just about every day for new ads). There is no big rush on these, so we'll just see if something comes along.
*Eventually, replace the lighting fixtures.
*Replace the door and frame for Eli's bedroom (we replaced the door slabs in the rest of the house, but his room needs a new frame, so we'll do this eventually--it's not urgent).

Anyway, remember how I mentioned that I'd like to try reupholstering a piece of furniture? You all know I love all things crafty, and I've been DIY'ing this entire project so far. And I've done a good job of it! So, I expected the upholstery to go smoothly.

Spoiler: It did NOT.

I found a couch at a used furniture store that I could tell was built very well, and we were able to get it for $240. The designer is Charles Schneider, and his company made very high quality furniture back in the day. I did not love the fabric on it (and that's an understatement), but I figured it would be a great piece to reupholster because it has "good bones" underneath.

Charles Schneider sofa

I only had it in my house a few days when my mom saw it and really loved it--as-is. When I told her I planned to reupholster it, she tried to talk me out of it. Eventually, she wanted to buy it from me to put in her house--because the quality was amazing.

Interestingly, a few days after I sold it to her, I found a couch on Facebook that was so similar I just knew it had to be another Charles Schneider. The fabric definitely needed to be reupholstered, and the price reflected that--they were only asking $30! So, I paid $30 for this couch and planned to try reupholstering it myself. I watched a trillion YouTube videos and I felt like I could do it!

Charles Schneider sofa

Sure enough, it was another Charles Schneider. I worked on it immediately after we bought it. I was really excited to try the reupholstering, because I love learning new skills. I bought an upholstery staple remover from Hobby Lobby, and went to town on the couch, removing staples left and right.

The evening that I worked on it, I kid you not, I spent six hours removing staples. And it still wasn't done. The next morning, I spent another four hours on it, and I finally had the old fabric removed. However, I discovered that due to the style of the couch, it was going to be much more challenging than I expected.

(To give you an idea of why this took TEN HOURS... each of these staples needed to be removed by hand! I have no question anymore about why it costs upwards of $700 (plus materials!)  to reupholster a couch):

upholstery staples

Also, thanks to the staple removing, my carpal tunnel came back with a vengeance.

I hadn't had many symptoms lately, because I'd taken a break from the tedious painting and things like that. But pulling out all of those staples definitely flared it up. And I knew I'd have to actually staple about two thousand staples back IN to the wood using the new fabric. I felt super overwhelmed, and I decided to call it quits.

After 10 hours of removing staples, I didn't even get far enough to start reupholstering. I had discovered that I would need to buy more foam (the couch had been quilted to the foam underneath, so that foam was unusable). Also, the front curve of the couch would make things challenging as well. I should have started on something small, like an ottoman!

Thankfully, I was only out $30 instead of the $240 we paid for the first one. (The first couch looks really good in my mom's house, actually! And she loves it. It worked out well.)

So, now we are back to square one with the couch. I adore my orange couch and chair, and I clearly will not find another couch to match (if any of you happen to have an orange 1976 Citation by Kroehler sofa, please let me know!) so I'm thinking that gray will work well. I don't want to jump the gun, so I am going to be patient until the right one comes along (like the orange one that I adore!).

So, for now, I've learned that upholstering furniture is definitely not my forte, and I'm okay with that. I almost felt relieved knowing that I don't have to worry about it now.

Meanwhile, I am working on the kitchen island, and it's been a big project. The island itself wasn't too difficult (I built the entire thing from scratch!! Except for the cabinet doors--I just painted those).  Here is what it looked like before (a pile of materials):

materials for a kitchen island

And then several hours later:

DIY kitchen island

Pretty cool, right?! I love love love the Kreg pocket hole jig. I made the whole thing using pocket holes, and it was so fun to build!

However, the finish that we have planned for the top has been a challenge, so I will write a whole other post about that. The countertop itself is done, but we have plans to make it kind of "special". Hopefully I'll have a good update next time! (And hopefully, I'll write the update much sooner than the previous)


December 11, 2018

The Best Stocking Stuffer! (A RoadID Review and Discount)

I've been meaning to write this post for a long time, but it has all been reliant on a single photo of my my family in the same place at the same time. (Not necessary, but it's what I had in mind.)

Anyway... you know I don't write sponsored posts very often. Maybe once a year? I save sponsored posts for things I REALLY believe in, or products I use myself. This post isn't sponsored in the sense that I earn money for writing it (I'm not) or that I earn a commission in any way (I don't).

RoadID simply gave my family and me new bracelets with updated info. I have to say, though, that I LOVE this company and this idea as a whole. I bought my first Road ID several years ago, after I broke my jaw. I was worried about running and possibly fainting during a run, and having the bracelet gave me peace-of-mind.

What is RoadID?

I could quote from their website, but here is what Road ID is to ME: My RoadID is a bracelet that contains my vital information in case of a medical emergency--my name, Jerry's phone number, my blood type and allergy info, and other medical things that may be relevant in an emergency.

At first, I thought this would be great for when I run. Then I realized it'd be perfect for my kids--when we go out somewhere, and if we should get separated, at least they will have their RoadID bracelet with my phone number on it!

I bought one for each of my kids, and I included their emergency contacts as well as their basic medical information. If nothing else, it gives me peace of mind that if they should get lost, they will have the means to get back to me.

The info was pretty out of date, and when I got an email from RoadID asking if we'd like to try their new line, it reminded me that it was time we update our old info. RoadID's new styles are amazing, and since I haven't been running as much (ahem, if at all) I loved the idea of having a "regular" looking bracelet to wear on a day-to-day basis. With my history of syncope (fainting) and a few other issues, I thought it would be a great idea.

So, RoadID was kind enough to send Jerry, the kids, and me wrist ID's from their new line. And we love them!


Honestly... I am not just writing this because we got them for free. (I have paid from my own pocket for these before, and I LOVE them.)

When I was coaching cross country, I thought about how convenient it would be if all of the kids had a RoadID--their emergency info right there on their person for whenever we may need it. The odds are that we won't ever need it, but for the rare instance that we may... having that info is crucial!

I am not earning commission or anything for this post, so I hate to sound sales-pitchy... but if you are looking for a stocking stuffer or if you have a child or if you run solo or if you just want the self-assurance that your information is readily available in case of emergency, you should definitely give RoadID a look-see!

And because they are so generous, Runs for Cookies readers can get $10 off a purchase of $20 or more! Just use this link when ordering.

They have lots of different options when ordering (Jerry, the kids, and I each ordered different ID's). And you can choose whatever you'd like to have inscribed on your ID. My kids really love theirs, and they even wear them to school because they "look cool".

Noah chose the Elite Leather Buckle model in black, and Eli chose brown. They each chose the rose gold face plate, while Jerry and I chose slate. They also have a black option.


Jerry and I chose the nylon loop "elite" model. I got the smaller version (smaller meaning narrower). We customized the colors to our liking, and chose what we wanted printed on the ID's. (I'm sorry that I have to blur out most of it for privacy!).

(I got a little extra piece to add to Jerry's and my ID's--for him, I chose a heart. Because he's a romantic and I knew he'd think that was cheesy and cute. For me, I chose "Believe". I have a hard time believing in so many things--compliments, goals, my own self-worth. So I thought it would be nice to have a reminder.)

I put my basic info on there: my name, emergency contact (Jerry, with his phone number), blood type (O+), NKDA (no known drug allergies), and a few other things, including bipolar.


They are all very good quality. If I had been paying out of pocket, I certainly would have hesitated... that's a lot of money for an emergency contact bracelet! But after receiving the product and using it for a month or so, we all really love them and I believe it's worth the investment.

Anyway, you know I hate to sound like a salesman, but this is one product I really believe in, and I think that everyone should have one. And with Christmas right around the corner, this would be a great stocking stuffer! (They even have a pet ID that fits on your pet's collar--and it is "jingle free"! We take off Joey's "necklace"--that's what we call his collar--when he's inside because the noise is annoying.)

Here is the link you can use to save $10 on an order of $20 or more. Again, I don't get anything for your ordering; but I really do think you'll think it's worth it, for the peace-of-mind alone!


December 10, 2018

A Match Made in Heaven!

When things are truly meant to be, I swear that there is a way they will happen. (Well, I like to think so, anyway.)

In a previous post, I revealed a fun thrifty find (an orange chair for my living room as we makeover our house). I have always loved retro styles--even as a teenager, I would shop at thrift stores and pick out some things that definitely were not the "in" trend. I loved polyester pants! haha.


I think that photo was from 1998...?

In college, my roommate and I found this awesome lamp--it had a spring in it, so the pole would go from the ceiling to the floor. (I just Googled it and discovered it's called a "tension pole lamp". I really wish we'd kept it! It's selling for hundreds on Ebay, haha).

retro floor to ceiling lamp

Anyway, as we've been making over our house, I've definitely been updating things--like the ridiculous amount of oak-colored everything. However, I still want to add my personality to it, whether it's "cool" or not. And since I love retro things, I'm always looking for ways to incorporate them into the more updated colors.

Orange, for example. Orange is my favorite color, but it is usually the least popular when it comes to home decor. It's so hard to find anything in orange! So, I bought a gallon of orange paint, and have added a little here and there. Orange was definitely a popular color in the 60's and 70's, which is great--I can combine my favorite color with a retro look.

Anyway, the chair that I bought was a bit retro, and I love it. Even the fabric felt like it was at least a few decades old.

I had been wanting an orange couch, but after looking every day at ads and not finding anything, I decided to get the orange chair and then hopefully get a couch where I could incorporate orange in some way (maybe a gray couch with orange accent pillows or something). Even if I found an orange couch, the shades would be different, so it wouldn't look right together.


A couple of nights ago, I was doing my quick routine search through Facebook Marketplace, and was just about to call it quits for the night... and then I saw it.

THE PERFECT ORANGE COUCH.

mid century modern orange sofa

It was like someone had pulled ideas out of my head and knew exactly what I was looking for, and then turned it into the couch of my dreams. I knew, instantly, that I wanted it. I sent the seller a message immediately, asking if it was available (the last few messages I sent people were replied with a "sold" message).

He responded that yes, it was available. And yes, the color was accurate in the photos. My heart felt like it was pounding out of my chest, because there had to be some catch to it. I asked if it was from a non-smoking home (which is a deal breaker for me if it smells like smoke). Yes, he replied, non-smoking.

It was listed at $375, which is more than I'd budgeted for a used couch, so I asked if he'd take $300. And he said yes. We made arrangements for pick-up, and Jerry and his dad drove all the way up to Troy (over an hour away) to get the couch.

It was in fantastic condition! The original receipt tag is stapled to the frame inside the couch, and it was built in 1976. The coiled springs are still in mint condition, and even the cushions on the sofa were practically like new. It even had the original arm rest covers!

Kroehler furniture manufacture tag


Anyway, I still hadn't seen it in person until Jerry and his dad brought it here. When I saw it, my jaw dropped. It was the EXACT SAME FABRIC as the chair I bought!

orange sofa and orange chair


What are the odds?! The two pieces literally look like they could be part of a set. I was stunned, and (obviously) super thrilled. I feel like it was totally meant to be! I had tried to buy other used couches, but they sold before I replied to the ad. And now I know why! This is a match made in furniture heaven :)

(I learned that the seller and his wife like to find and sell mid-century modern furniture... he has an Instagram with his findings, which you can find here.)

I am about to start on my next DIY project... and this one should be fun. Here is a clue:


December 08, 2018

What it's like to try on clothes after a 30-pound weight gain

weight loss jeans comparison


This post is not going to be whiny, I promise. I just discovered something very interesting when I was trying on clothes yesterday, and I thought I'd share my thoughts.

To recap, I lost 125 pounds from August 2009 to December 2010. In the time since then, my weight has gone up and down a LOT, but my current weight (163) is the heaviest I've been since 2010. So, I've spent most of the last eight years or so at a fairly "normal" size.


I've gotten numerous emails over the years asking about my mindset after losing the weight. Did I see myself as the new, thinner me? Or did I still see the 253-pound me?

And to answer that, it probably took me about five years to finally see myself as "normal" or even "thin". I had very distorted vision when looking at myself in the mirror. I always saw myself at least 50 pounds heavier than I was. I know that sounds kind of ridiculous, but my mind played tricks on me.


I would even have Jerry take a photo of me before going out so that I could see what I "really" looked like. Sometimes, I thought I looked terrible, but then in the picture, I was surprised to see that I looked good.

When I would do laundry and fold clothes, I couldn't believe that the jeans I folded were actually mine. Sometimes I would even put my jeans in the kids' dressers because they just looked so small!

size 24 versus size 4

When shopping (I only ever buy clothes at thrift stores, and they are completely unorganized--nothing is arranged by size), I would flip through the racks of jeans and when I found a pair I liked, I'd mentally judge if they were my size before finding the tag to check.

Almost always, I would think, "Oh, these look about my size" (when I was a size 4) and then I'd look at the tag and it would show a size 10 or 12. I would look at a size 4 and think they wouldn't even fit my thigh!


FINALLY, a few years ago, I started seeing myself as thin. When I dropped from 160 to 121 between September 2015 to February 2016, I actually saw myself as normal, or even thin. It felt fantastic to finally have my mind catch up to my body!


(I remember, very specifically, not wanting to post the above photo on my blog because I thought I looked too fat. Crazy, right?!)

When I would go shopping, I'd flip through the rack and when I found jeans that I thought would fit, I'd see the size 4 (or even 2!) and throw them in the cart to try on. The size 6 or 8's looked way too big for me, because I'd gotten so used to the size 4's.


Sooooo... I am finally getting to the point of this post.

I am now at 163(ish) pounds. (Yes, even after a virus that made me throw up for two days, I didn't drop a single ounce!). Yesterday, I went to Salvation Army to look for a couch, and while I was there, I decided to check out the clothes.

I have always hated shopping when my weight is up, but I haven't been losing any weight lately, and I desperately need clothes that fit. I have a couple of pairs of jeans that fit, and that's it. All I've been wearing lately has been yoga pants or sweat pants (likely with paint on them) and big t-shirts or hoodies.

When shopping yesterday, I had no clue what size to even consider. I started flipping through the racks, and when I'd find something that I liked and I thought looked to be my size, I'd check the tag... and almost always, it was a size 4. It's like my brain is now stuck with the mentality of me being much smaller than I actually am!

(Just FYI, the photos I'm using in this post are not current... I remember HATING the photo below because I thought I looked so fat! *eye roll*)

trying on clothes in the fitting room

When I grabbed some 8's and 10's to put in the cart, I thought there was no way they would fit--I figured they'd be too big. They looked way too big! (I mean that in a relative way--I am not saying that size 8 or 10 is "too big", just that my brain is fucked up and plays tricks on me.)


(In the above photo, I'd actually found a dollar in the pocket of the jeans I was trying on! This happens more than you can imagine. Last weekend, I found a $20 bill!)

I've been wanting a pair of light-washed baggy jeans to replace a pair that had become so worn I finally had to throw them out, so I found a few that I liked and I thought they'd be perfect. They looked like they'd be baggy.

With a cart full of sizes 8 and 10 jeans, I went to the fitting room. Pair after pair, I pulled them on. Some, I couldn't even get past my thigh. A few of them would button, but looked way too small. And there were a few that actually fit. (Which is typical, because different brands fit differently.)

I was shocked. The jeans that I thought were going to be really baggy actually didn't even button. With each pair that I tried on, I got more and more surprised--and kind of mad at myself for not seeing it before.

Anyway, I thought this was an interesting topic. A lot of times, when we lose weight, we don't see ourselves as thin (or whatever our weight is). We always see ourselves at our heaviest and think of ourselves as our heaviest.

I never imagined that a day would come where I see myself as thinner than I actually am. It's kind of fascinating! I've always wanted my brain to catch up with my thinner body, but clearly it's still lagging behind ;)


December 06, 2018

A Thrifty Find!

Ugh, it's been a rough few days. I've been sick with some sort of stomach bug. (Skip all this if you don't want to get grossed out.)

I woke up during the night on Monday feeling super nauseous. It was so random! I hadn't eaten anything that could have caused food poisoning, so I had no idea what the deal was. I made it to the toilet just in time to throw up for what felt like an eternity.

Finally, my stomach was completely empty, and I went back to bed. On Tuesday, the same thing happened all morning. Once, I didn't even make it in time and I threw up on my legs and feet in the bathroom. So gross!

I was drinking water, but I couldn't even keep that down. As soon as I would drink some, my stomach would start rolling again. I slept for most of the day on Tuesday. I was finally able to eat a little in the evening (I had some broth and an apple).

Yesterday, I felt better--not 100%, but definitely better. I wasn't throwing up, but I was nauseous and tired. Today, I have ZERO energy. I am so ready for this stupid virus to be gone! I am going to take something to help me sleep tonight (I haven't slept well in what feels like months) and hopefully I will feel better tomorrow. I've been trying to rehydrate today--slowly, because it makes me nauseous to drink anything.

Anyway. That's about all that's been going on. I did have a cool thrift find last weekend, though, which I will post about below. Eventually, during this whole house project we have going on, we want to replace the living room furniture. So, I'm always looking for good deals on used furniture pieces.

I found this chair while I was looking at Facebook garage sale pages. I really wanted an orange chair (or couch) and when I saw this one on Facebook, I knew it was perfect!

orange chair

Jerry and I drove all the way up to West Bloomfield to pick it up (a little over an hour away). I paid $100 for it, which actually worked out well because I had just sold our coffee table on Facebook for $100. The trade was well worth it. It's in perfect condition, and the color is exactly what I wanted.

Remember when we got our enormous couch at a used furniture store? Well, we LOVE that couch so much--super comfy!--but it definitely needs to be replaced. The frame is broken in a few places and Joey scratched the hell out of the cushions.

I'm pretty sure that I don't want a sectional again (they take up so much room and there aren't many ways to rearrange the furniture). So, I've been browsing Facebook Marketplace to find a used couch (and I've been selling some things on there, too). A few months ago, I would have said this thought was crazy, but now it doesn't seem so out there--I think I would like to try my hand at reupholstering. I know! That's a big project.

But I could get a couch for $50 or $75 and see if I can reupholster it--not just to save money, but to learn a new skill. (I am clearly loving all of this DIY stuff). If I am terrible at it, then we'll just have to buy a better one. But I think it would be really fun to try reupholstering a couch with good bones!

I finally got to try out my Kreg jig, and I'm super impressed with what I've built out of a sheet of plywood and some scraps. I still have to put a second coat of paint on it. I'm going to wait until it's finished to reveal it, though ;)

Right now, I'm off to bed! I started this post this afternoon, and I'm finishing it now (almost 10:00 pm) and I'm already feeling much better than I did earlier. Hopefully I sleep well and am back to normal tomorrow!


December 03, 2018

Intermittent Fasting: My 30-Day Trial Thoughts and Results

Intermittent Fasting: My 30-Day Trial Results

I thought this photo was entirely appropriate for this post, considering Luke and I were only pretending to eat! hahaha.

This post is overdue by a few days, but time seems to be going way too fast. I had a super busy weekend, of which I spent about half of it in the car--ugh. I had to drive back and forth to a few events that were each over an hour away. I'm hoping this week will be a little less busy.

Anyway, I wish there was a huge update on the 30-day trial I did of intermittent fasting. Here's the basic rundown...

To start this whole trial, I was hoping for a few things: 1) Lose weight; 2) Improve digestion--feel less bloated; 3) Sleep better; 4) Feel an overall sense of well-being.

Week 1: Started with a 16:8 hour ratio of fasting to eating (not super strict to that--sometimes it was 18:6, or somewhere in between). Didn't count calories or anything, just ate within a certain time frame. On this week, I gained 0.4 pounds.

I discovered that I enjoyed doing intermittent fasting, however. I'll write more about that below.

Week 2: Reduced the eating window down to more of 18:6, and tried to reduce the amount I was eating. Lost the 0.4 pounds that I'd gained the week prior, bringing me back to my starting weight.

Week 3: Reduced the window again to a 20:4 ratio. Weight stayed exactly the same!

Week 4: Increased the window back to 16:8. Felt much hungrier than I had the previous three weeks. Gained 1.4 pounds.

I had hoped that I would have been writing about a good weight loss! I even took beginning body measurements, starting photos, and body fat percentage to do a comparison on this post. But nothing has changed, unfortunately.

However! I did have some outcomes that I found beneficial...

1) I stopped thinking about food all the time. It was so nice not to have to worry about what to eat for breakfast, what to eat for lunch. I didn't have to buy food for those things. I typically broke my fast with dinner at around 3-4 pm, and then had a high-calorie snack later.

2) Food tastes a million times better when I'm hungry. Breaking the fast for dinner was so good!

3) My digestion issues improved a LOT. No bloating or stomachaches (other than what I'll note next).

4) I discovered foods that don't really agree with me and cause stomach problems. Because I was fasting, once I broke the fast and got a stomachache, I was able to pinpoint what was causing it. Interestingly, the major food that my body doesn't like is bananas. Last week, I tried breaking my fast with a snack and having dinner a little later, and I learned that bananas give me a bad stomachache for about three hours.

This was interesting to me because I always used to get stomachaches when eating English muffins with peanut butter and sliced bananas for breakfast. I always assumed it was the English muffin causing it (and yet I continued to eat them, because I loved that breakfast). I think that fasting is a really great way to learn what food your body agrees with.

5) Fasting kept me from binge eating, which was a surprise to me. I was worried that not eating until afternoon would make me eat everything in sight, but the opposite happened. I found that because I broke the fast with a nice-sized dinner, I was satisfied for several hours afterward and had no desire to binge.

6) As far as sleeping goes, I didn't notice a difference.

7) And as for feeling an overall sense of well-being, I really did feel good. I loved not feel full or bloated. A couple of years ago, I literally used to look six months pregnant sometimes after eating, even if I didn't eat much. It was painful and miserable! When fasting, I didn't have that problem. (Other than the banana and one or two other foods)

8) I ate much healthier than I did prior to the intermittent fasting. Like I said, I broke my fast with dinner, which was usually home-cooked (crock pot meals, lately!). And later, I would have a high calorie snack--usually cheese, crackers, and salami; nuts; or oil-popped popcorn. I wasn't craving sugar very much. Once in a while I would have peanut M&M's or something, but I definitely preferred salty or savory snacks. Crazy for me! haha

So, even though I didn't lose any weight, I did find a lot of benefits to the intermittent fasting. I think if I want to lose weight, I'll need to either get back to eating intuitively like I did last year or count calories. I didn't feel like I was eating too many calories while intermittent fasting, but I wasn't counting, so maybe I was.

In 2017, my whole mission was to find peace with myself and live my happiest life. I lost that feeling about a year ago (it was right around the time when Jerry started experiencing depression, and in retrospect, I wonder if that had something to do with it--maybe I felt guilty for being happy?). I'd like to work on that again, though. Jerry is doing much better after starting an antidepressant a couple of months ago.

I've found a lot of joy in this project with giving my kitchen, living room, and dining room a makeover, and I will definitely continue to work on that (there is still a lot left to do!). I also printed out a list of "150 things to throw away", and I found that very inspirational! I would love to minimize the "stuff" I have, and I think that would bring me joy as well.

Using a router to make my own laminate countertops
My first time using a router! Making my own laminate countertops.

As far as where I'm going from here...

I still want to lose weight. My clothes are all tight, and I was pretty upset when I tried on some clothes at Salvation Army a few days ago and they weren't even close to fitting. Right now, I don't even care if I don't get back down to my goal weight, but I really want to get down to about 145 to feel more comfortable.

Since I really liked the intermittent fasting, and I really want to focus on finding happiness again, I think I will continue to do the fasting, but I'll keep a bigger window (16 hours fasting, 8 hours eating). And I will do my best to eat the intuitive way I did when I was my happiest last year. (If that doesn't work, I can always count calories--but I'd like to try this way again.)

I fell out of my running groove again when I had to do all of the plumbing stuff for the kitchen. I'm not going to be super strict with it, but I would definitely like to do it when I can/want to fit it in. I kind of miss running in the winter! So odd, because I have turned into a baby in the cold weather, but I was feeling nostalgic for it a couple of days ago.

So, basically, I'm going to take each day as it comes and do the things that make me happy (and skip the things that don't--unless they are necessary, of course). I'd like to work on my 40 Goals by 40 Years Old list, which will be fun.

This 30-day experiment with intermittent fasting made a pretty big impact on not just my eating, but my life as well. I never would have expected that! I'm really glad I did it :)


Featured Posts

Blog Archive