Showing posts with label favorite recipe. Show all posts

June 19, 2023

RECIPE METHOD: Shredded Seitan


Seitan (pronounced SAY-tan) is one of those "weird vegan foods" that I swore I'd never cook. I had absolutely no clue what it was until I attempted to make it for the first time. I learned that making seitan is more of an ART than anything else--getting the texture and the taste right is a lot more difficult than I thought.

First, if you don't know what seitan is, I'll explain in a very tiny nutshell: Seitan is a vegan meat alternative that is made out of vital wheat gluten. Vital wheat gluten is what is left when you remove *everything* but the gluten from wheat flour. Gluten holds things like dough together and makes things stretchy (think pizza dough). This is what vital wheat gluten looks like:


It looks like flour, basically, but it's "springy"--which sounds odd until you see it for yourself. Anyway...

All seitan has one common ingredient: vital wheat gluten. But there are a million recipes out there for different flavors and textures of seitan. You can make it taste like pretty much whatever you'd like, based on what seasonings you use. Depending on what you add to it, you can get all sorts of different textures. Usually, the recipes involve adding some sort of protein (like tofu or beans), lots of seasonings, and vital wheat gluten. The only other thing you need is a blender or food processor.

I tried what felt like ten billion recipes for seitan and something was always off. Each time, though, I learned something else I might be able to tweak for next time. When I mentioned this several weeks ago on my blog, someone asked for the recipe--and naturally, I forgot to share! However, I made some seitan today, so I took pictures for the post.

This recipe for seitan is meant to replace shredded chicken. I tried so hard with other recipes to get the shredded texture and it just wasn't happening. This recipe is where it finally came together for me. Then I tweaked it to my preferences in taste and method. This recipe isn't from one source, although the basis of it comes from this video on YouTube by Green Beets Kitchen. That is how I made it before I started tweaking things.

Below is the recipe as I make it... including my changes. This is how Jerry and I like it best!

(Here is a PDF copy if you'd like to print it!)

First, the ingredients:


480 mL water
2 Tbsp. miso paste
1 tsp. salt (or ¾ tsp. salt + ¼ tsp. msg)
2 servings vegan “chicken” bouillon powder (2 cubes, 2 tsp. paste, etc. I use 2 Tbsp. of this homemade vegan powder)
2 tsp. garlic powder
1 Tbsp. onion powder
½ tsp. white pepper
20 g. nutritional yeast
1 Tbsp. white wine vinegar
1 Tbsp. neutral flavored oil
70 g. pea protein isolate powder
230 g. vital wheat gluten

Notes about ingredients:

Since seitan can be finicky, the difficult-to measure-ingredients are listed by weight--which makes it much more consistent. (I love when recipes list ingredients by weight!)

About the msg (monosodium glutamate)... I know it's a super "frowned upon" ingredient, so it's definitely not necessary here. However, after reading quite a bit about it a while ago, I decided to give it a try in this recipe. The point is, though, it's optional.

The vegan "chicken" bouillon... this can be vegan bouillon cubes or paste or powder. For this recipe, you just want two servings of it. I use 2 Tbsp. of this homemade bouillon powder by Plant Power Couple. (I use that powder for everything, by the way! I don't put the turmeric in it, though, just because of the color--it makes the seitan very yellow, which is off-putting.)

Pea protein isolate is literally just pea protein powder--I bought a big bag of it on Amazon and it was pretty cheap (especially considering we make this seitan all the time). The same with the vital wheat gluten--I buy big bags on Amazon (I use Anthony's brand for both of them, as well as nutritional yeast and several other products).

A note about appliances:

Most recipes call for use of a food processor to make seitan. I got rid of my food processor when I got the Ninja "all-in-one"-type system. I use the Ninja--I use the metal blade for the first part of the recipe and then the dough blade to finish it.


However, you can use whatever you have, as long as the motor is strong enough to hold up to the dough. I even used my KitchenAid stand mixer to knead the dough before! (It takes much longer, but I'll write about that later.) For this post, I'll refer to the appliance as a blender, since that's what I'm using.

Okay, on to the method of how I make the "perfect" shredded seitan...

First, just add all of the ingredients *except for* the pea protein and the wheat gluten to the blender:

1) Before blending; 2) after 30 seconds I scraped down the sides; 3) after another 30 seconds.


Then, you add the pea protein (don't add the gluten yet). This is what it will look like after blending with the pea protein:


Finally, add the vital wheat gluten to the blender:


(I switched out to the dough blade at this point. If you want to use a heavy duty stand mixer, you'll want to put it all in there now. If you're using a food processor, just make sure you don't overheat your machine. That goes for all appliances, really.)

Now comes the monotonous part. Blend on high with the gluten for 60 seconds. It will look like this:

60 seconds of blend time.

Let it rest for 5-10 minutes; this gives your motor a chance to calm down and it gives the gluten some time to activate (and become "stretchy"). After the rest, blend again--for 45 seconds. It will look like this:

1:45 minutes of blend time.

Rest the dough again, 5-10 minutes. Then blend on high again for 45 seconds. It should look similar to this:

See on the bottom right, how it's starting to look stretchy? 2:30 minutes of blend time.

Keep repeating this process--45 seconds on high, 5-10 minutes rest...

3:15 minutes of blend time

4:00 minutes of blend time

4:45 minutes of blend time

That last picture, the one that was 4:45 minutes of blend time, is what the texture should look like when it's ready to move to the next step. It will be very sticky and stringy. It'll feel like soft taffy, and you'll see individual striations/fibers when you stretch it.

(Note: Be careful not to let the blender get too hot--it will start to steam the seitan, and you don't want that! Just be patient and let it rest as often as needed.)

In this picture, you can see the comparison between just 45 seconds of blend time. If you stop too early, and it doesn't look like the ball on the left, then the texture won't be shreddable. You want it to look like the ball on the left:


Once the dough is ready, divide it into two portions:


Working with just one ball at a time, form it into a long rope (the longer the better; don't let it break, though!).


Once you have a long rope, grab a small bowl and add some water to it. Using your fingers, just barely glaze the rope with water to make it slippery (don't douse it with water, but you don't want it to be sticky for this next part).

Next, starting in the middle of the rope, tie a knot (the same kind of knot you would use to tie your shoe--very simple):


After that, tie another knot, directly on top of it, as close as possible:


Continue tying knots, dipping your fingers in the water as needed, until you reach the ends. Tuck the ends into a crease. You'll have a very odd-shaped ball:


Give it a gentle press together on all sides. Then lay it on a piece of parchment paper:


Tightly roll the ball in the parchment paper, then roll up the ends to seal:


Once it's wrapped in parchment, set it on a long piece of aluminum foil. Beginning at one end, roll it up just like you did with the parchment paper. Wrap as tightly as you can, but be very careful not to let the foil rip on the folds of the parchment:


Once you wrap both loaves, place them in a steamer basket. Cover and steam gently (a very gentle simmer) for one hour and forty five minutes. 


Carefully remove them from the steamer basket using tongs and place them on the counter to cool:


Allow them to cool at least one hour. Open while still warm for an easier time shredding (or you could place them in the fridge overnight before opening). This is what it will look like when you open it:


Kind of like a loaf of deli meat. To shred it is kind of fun! Just hold each end and twist in opposite directions. The loaf will start to pull apart at the "seams" (where the knots met):


As you "unfold" the rope, you can pull off the skin. (It tastes fine in my opinion, but it's not as shreddable.)


Once you have the skin removed, you can pull the seitan apart into smaller shreds:


Isn't it crazy how much it looks like meat?! And it was made from flour, basically.

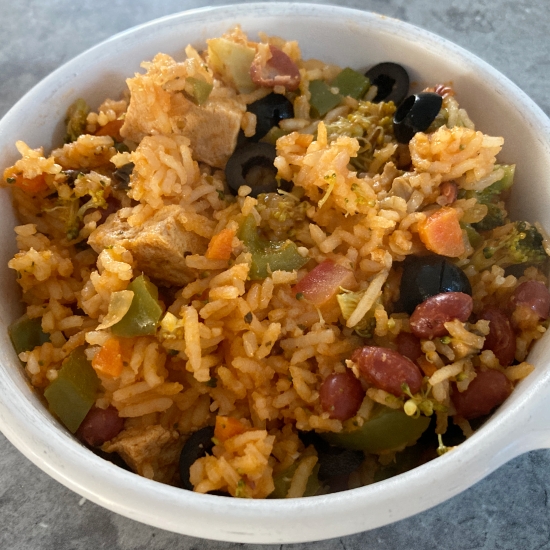
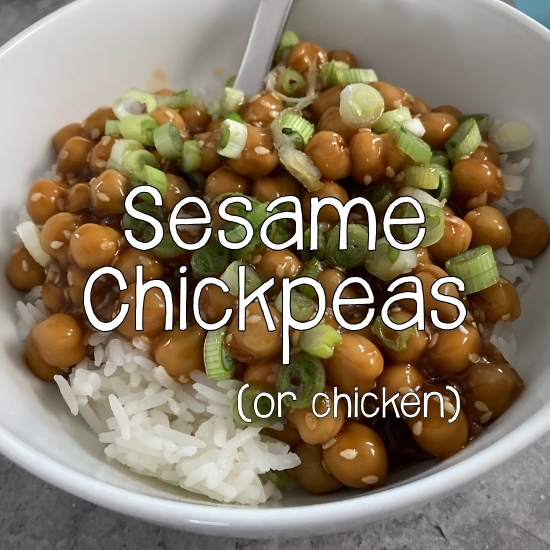
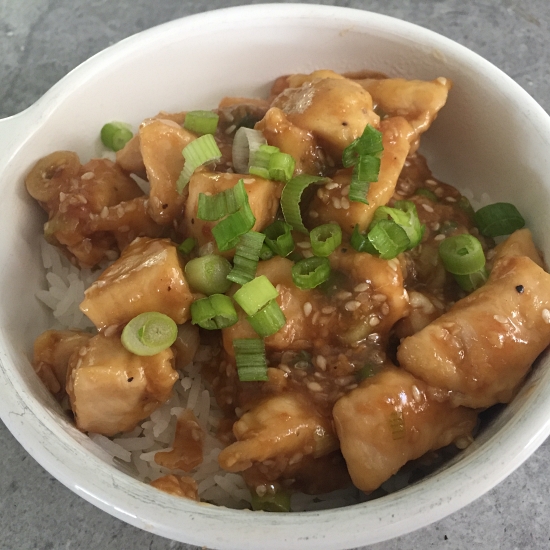
What do you do with it? You can use it anywhere that you would normally use shredded chicken or pork. My family really likes it with barbecue sauce for a super fast meal (when we have the seitan already shredded in the fridge). It reminds me of pulled chicken (but I don't get grossed out, wondering what I might bite into, hahaha).

Anyway, THAT is how Jerry and I really like our seitan. We continue to try new recipes, but this one is our go-to. The biggest key to remember is: The texture MUST look like shiny, stringy taffy before dividing into ropes in order to get the shreddable texture.

November 12, 2022

RECIPE: Everything Rice


This isn't a recipe review, but rather a recipe I adapted from a cookbook called 'How it all vegan!" by Tanya Barnard & Sarah Kramer. (In the book, it's called Kieran's Favourite Rice.) I found the book, which was printed in 1999, at a thrift store and even though there weren't pictures--I don't like recipes without pictures!--I figured it was worth a look-see for $1.

Well, let me tell you... if there is only one recipe in this book that is worth making, I'm so glad that I chose to make this. I've made a few others, which were good, but this is extra-level good.

This is my-whole-family-including-Eli-likes-it good! The second time I made it, I changed some things up and was more specific about ingredient portions, so this is the modified recipe. This is going to be a once-per-week staple in my house from now on.

This was my first time cooking tofu in a liquid. I wasn't thrilled about the idea of it because I just didn't want mushy tofu--the thought of it grossed me out. I always buy extra-firm tofu and I press it really well--usually overnight--so get the most liquid out of it and give it a meatier texture.

I was very surprised then, when I cooked the tofu in liquid this way, just how great the texture was! To describe it, I would say that it had the texture of an omelet, only a little firmer. The pieces held up well and didn't fall apart like I expected. AND ELI ATE IT. He only took a couple of the cubes of tofu, but he ate them and he liked them. That alone says it all.

I call this "Everything Rice" because it has a little of everything in it! Rice, lots of different veggies, beans, tofu, and herbs and spices. Even tomato juice instead of broth. This is a recipe that you can basically grab whatever vegetables you have on hand and toss them in. I really liked this combination of vegetables, though. Fresh green beans would be a good addition.

The nutrition profile of this rice is amazing. It reheats well. And it makes a huge amount (you may want to cut it in half if you don't want leftovers; we got six generous servings out of it).


Anyway, here is the recipe in printable form! But I'll post it here as well. Hopefully you'll enjoy it as much as my family does!

2 Tbsp. olive oil
1 onion, chopped
6 cloves garlic, minced
1 tsp. salt
2-1/2 cups tomato juice
1 cup water*
1 (14-16 oz) block extra-firm tofu, drained, pressed, and cut in bite-size cubes
1 green bell pepper, chopped
2 cups broccoli, cut into small florets
2 carrots, peeled and chopped
8 oz. mushrooms, sliced small
1 (15-oz) can red beans
1/2 tsp. dried basil
1/2 tsp. dried oregano
1/2 tsp. black pepper
1/4 tsp. cayenne pepper
1-3/4 cup basmati rice
2 roma tomatoes, chopped
1/2 cup black olives, sliced

Heat oil in a large stock pot over medium heat and add onions, garlic, and 1/2 tsp. of the salt. Stir frequently and cook until the onions are soft. Add the tomato juice, peppers, broccoli, carrots, mushrooms, beans, basil, oregano, black pepper, cayenne, the other 1/2 tsp. of salt, and water. Stir to combine, then gently fold in the tofu and rice. Give it a gentle stir, so as not to break the tofu.

Increase the heat to high, and bring to a boil. Cover the pot and reduce heat to low. Do not stir or remove the lid, or the rice may become gummy. Cook over low heat about 20 minutes, until the rice is cooked through. Remove from heat and gently toss in the tomatoes and olives. Makes about 6 generous servings.

*Note: You may need to adjust the amount of water depending on how much and what types of vegetables you use. I found 1 cup to be the right amount with the other ingredients as listed.

March 07, 2022

RECIPE: Sesame Chickpeas (or Sesame Chicken)


After posting about increasing my fiber yesterday, someone asked for the Sesame Chickpeas recipe. I didn't realize I never posted it before, so I figured I'd share it today. It's SO good! I always made this with chicken breasts until recently, so I'll write it out for both chickpeas and chicken, and that way you can make it how you like.

When making sauces like this (or General Tso's or Sweet & Sour, etc.) I like to use a mason jar. I put all of the ingredients inside, screw on the lid, and then shake it so everything mixes well. A lot of times, I'll prep the sauce in the morning and then when I want to cook, I don't have to take out all the ingredients; the sauce is ready.

If you like to have a lot of sauce so you can mix it into your rice, then you may want to double this sauce recipe.

Here is a printer-friendly version!

Sesame Chickpeas (or Chicken)

For the sauce:

2 Tbsp. soy sauce (I like tamari, but either is fine)
1 Tbsp. water
1-1/2 tsp. sesame oil
1-1/2 Tbsp. brown sugar
1-1/2 Tbsp. rice vinegar
1/2 tsp. fresh ginger (I buy this in a squeeze tube to keep in the fridge)
2 cloves garlic, minced
2 Tbsp. sesame seeds
1 Tbsp. cornstarch

Other ingredients:

2 (15 oz) cans chickpeas OR 1 pound chicken breasts, cut into bite-size pieces
2 tsp. cooking oil if using chicken
cooked rice or other grain for serving
4-5 green onions, sliced, for topping

Mix together all of the ingredients for the sauce and set aside.

If using chickpeas: Drain and rinse the chickpeas. Pour the chickpeas and sauce into a medium-size pot and heat over high heat just until it comes to a boil and thickens (there is no need to cook canned chickpeas--they will heat through with the sauce). Remove from heat and serve over rice; garnish with green onions.

If using chicken: Heat oil in a skillet over medium-high heat and add the chicken. Sauté until the chicken is browned and cooked through. Add the sauce and bring just to a boil so that the sauce thickens. Remove from heat and serve over rice; garnish with green onions.


Variations:

Steam some broccoli or other vegetables on the side and stir them into the chickpeas or chicken with sauce.

Use another sort of grain for serving. My favorite is barley, but I've also used quinoa.

If you like a light breading on the chicken (I haven't tried this on the chickpeas, so I'm not sure if that would work), put an egg and 2 Tbsp. cornstarch in a Ziploc bag and seal. Mash the egg and cornstarch together. Then add the chicken and and shake to coat. Then add to skillet as above.

February 19, 2022

RECIPE: Cookie Dough Dip

vegan raw cookie dough dip

In other words: Peanut Butter Oatmeal Chocolate Chip Cookie Dough Dip. *YUM*

Since I wrote last week that I won't likely being doing many heritage recipes anymore now that I'm eating a vegan diet (to hopefully help with my chronic pain!), I had the idea to try out some vegan recipes and write about those--yes, even the "eww, weird!" ones, haha.

I'm still unsure how to structure these posts; I can't post someone else's copyrighted recipe, but I'd like to try the recipe exactly as written, which is how I was doing the heritage recipes.

So, I was thinking that in the case of copyrighted recipes, I could just list the ingredients here, and then link to the original page with the instructions; that way, people would still have to visit their site to prepare the recipe. If anyone else can think of a better way of doing it, please let me know! (Or if you have your own recipes that you don't mind me posting here--giving you credit, of course--please email them to me and I may try them and post about them.)

This first recipe in this new series was sent to me by a reader (she sent me the link) and interestingly, I already had an almost identical recipe on my blog already--from 2011! The only difference to it is the  addition of oats.

I have to tell you, this sounds like such a WEIRD combination of ingredients and I wouldn't blame you for skipping past this post. However, you will be missing out. Vegan or not, this recipe is amazing! Even Eli loves it, and he likes pretty much nothing but junk food.

As far as junk food goes, this is actually the healthiest "junk food" I've ever made. While it's technically considered a dip (for apples, graham crackers, or whatnot), I prefer to eat it as is--straight from a little bowl. It's like eating raw cookie dough--peanut butter, oatmeal, and chocolate chip cookie dough. 

vegan raw cookie dough dip hummus

For this recipe, I'm going to combine the two--the one on my blog from 2011 (I redirected that link here to update it) and this one that a reader sent me the link to. That way, I can share the whole recipe (since we prepare the surprise ingredient in different ways). The one that I write out here will be the one that I made yesterday (pictured above) and definitely the one you should try ;)

Since I've started eating a lot of fiber, and now that I'm eating vegan, I've not been eating many sweets at ALL. My options are so limited and it's inconvenient; also, the fiber keeps me full and satisfied. However, I had a mad craving yesterday for something sweet and I decided to take the time to make this Cookie Dough Dip (or, as I called it back in 2011, Cookie Dough Hummus).

The "secret ingredient" in this cookie dough dip is actually chick peas! (Garbanzo beans)

I swear on my life you cannot taste them. 

A note on prepping the chick peas... in the recipe from Tidbits (the one that was linked above, with the oats), she uses a pressure cooker to prepare her chick peas from dried ones. I've never done that, so I can't attest to whether it's worth it; however, the reader who sent me the link to the recipe said it's absolutely worth cooking your own rather than using canned.

I don't have a pressure cooker, so I just used canned chick peas. The Tidbits recipe skips this next step, but I do it because it really does make a difference in the final texture of the dip: I peel the chick peas.

WAIT! Before you click away, it's really not that hard. Just hold a chick pea with your finger tips and then use the fingertips from your other hand to grab the chick pea and give it a gentle squeeze--the skin will come right off. It took me about 10 minutes (where I just sat and watched a TV show while peeling) to peel the whole can.

So, drain and peel the chick peas. Then, here is the recipe for the (vegan) Cookie Dough Dip:

Ingredients

1 can of chick peas, drained, peeled, and rinsed
1/4 cup of natural peanut butter (I LOVE Smucker's natural, but any kind will do)
6 Tbsp. pure maple syrup (you can try using less of this, but I used 6 Tbsp. and it was perfect)
1-1/2 tsp. vanilla
a pinch of salt (roughly 1/8 of a tsp.)
1/4 cup vegan mini chocolate chips (I have the "Enjoy Life" brand and they are great!)
1/3 cup of quick-cooking oats (NOT instant oats, like the flavored packets--but the plain, quick-cooking ones)

Directions

Drain, peel, and rinse your chick peas. This is the most tedious part, I promise.

In a food processor, add the chick peas, peanut butter, maple syrup, vanilla, and salt. Purée until very smooth--you'll have to stop and scrape down the sides of the bowl a couple of times to make sure you don't have chunks of chick peas in it.

Once it's puréed very smooth (it will have a thin consistency), move it to a bowl and put it in the fridge for about 10 minutes. Lick the spoon so you can see how tasty it is! Then remove it from the fridge and add the oats and chocolate chips. Fold those in well until it's all mixed together. Place it back in the fridge to thicken up. (If it's too thick, just add a little almond milk or soy milk or other non-dairy milk and stir well.)

From here, you can use this as a dip for fruit, graham crackers, pretzels, or even spread on toast; however, I really like to just eat it out of a small bowl. It's like eating raw cookie dough! It tastes like peanut butter-oatmeal-chocolate chip cookie dough.

You can divide it up how you like, but here is the nutritional info for the entire recipe:

Calories: 1294
Protein: 33 g.
Carbs: 177 g.
Fat: 57 g.
Fiber: 19 g.
Iron: 9 g. 

(I was especially interested in the fiber and iron--that's a lot of fiber for a "cookie dough" treat!) If using this as a dip, I would guess it would make 6-8 servings. If you're just eating it as a treat from a bowl, I would say 4 servings. The total recipe made 455 grams--which makes it easy for you to divide accordingly.)

Here is a printer-friendly version of the recipe!

Overall thoughts: This vegan treat is a BIG winner! I hadn't made it in probably 10 years, so I'm really glad that a reader shared a similar recipe with me to remind me of it. I love the addition of the oats--they give it great texture.

The only problem with it is not eating the entire recipe in one sitting ;)

July 17, 2021

HERITAGE RECIPE: Fruit Cocktail Cake


I will start by saying, boy, did this recipe surprise me!

I'm glad I didn't google "fruit cocktail cake" before I made this, because I would have seen that it was actually a pretty popular dessert back in the day and there are a lot of recipes for it online. I probably wouldn't have made it if I had known that. I'm so glad I made this, though, because it turned out to be one of the best cakes I've ever tasted (and I love cake!).

I wanted to make something that seemed unique, and when I was flipping through the heritage recipes, this one for "Fruit Cocktail Cake" caught my eye. I envisioned those old Weight Watchers recipes where they mixed all sorts of weird ingredients. I've never seen a cake with a can of fruit cocktail in it before, so I decided to try it out. I did not have high hopes for it actually tasting very good, but I was interested to try.

This recipe was submitted to the Rockwood, Michigan Area Historical Society via a handwritten recipe book from Edna Crispin. I'm not sure who passed the recipe book along to the Historical Society, but there are several recipes in the book that came from Edna's handwritten file.

Edna Crispin was born in 1899 and passed away in 1971. It was noted that her recipe file was from the 1930's. Unfortunately, I couldn't find any other information about her.

As always, I am typing out the recipe exactly as written (except for the printer-friendly version, where I write any clarifications). I didn't modify or change anything--just followed the recipe.


Here is a printer-friendly version!

Fruit Cocktail Cake

2 eggs
1-1/2 c. sugar
1/2 c. Wesson oil
2 c. flour
2 tsp. soda
1/2 tsp. salt
1 (No. 303) can fruit cocktail

Beat sugar and oil; add eggs, flour, salt and soda. It will be crumbly. Add cocktail and juice. Pour into greased, long, flat pan. Sprinkle 1/2 cup Angel Flake coconut over batter. Bake at 350 F for 35-40 minutes.

Icing:

3/4 c. sugar
1 stick oleo

Boil together 1 minute. Add 1 teaspoon vanilla, 1/2 cup coconut and 1 cup nuts. Spread on cake while still warm.

My Notes:

The first thing that stuck out to me was the Wesson oil. I recognized the brand and I wanted to check that it was an actual product back in the 1930's--and sure enough, it was. The same with the canned fruit cocktail--I pictured that to be a product of the 1950's or so. This recipe called for specific brands--the Wesson oil and Angel Flake coconut. Not sure if it really matters (probably not!) but I wanted to follow the recipe as written.

I had to look up the size of a No. 303 can and here is what I found:  A #303 can is equivalent to 2 cups or 16-17 oz. I wasn't sure whether to buy the fruit cocktail in syrup or juice, but in reading the recipe, it says to add cocktail and juice to batter. I guess "juice" could have meant the liquid the cocktail was in--syrup or juice--but I decided to go with the juice.

I got over my aversion to oleo (margarine) when I started this recipe series--so many of the early 1900's recipes call for oleo instead of butter. When the recipe states "oleo", I use it. I don't know if it would make a difference or not to use butter.

It did not specify what type of nuts, but I used pecans.

The batter started out looking pretty good--it actually looked like thin cookie dough.


After adding the can of fruit cocktail, I definitely thought it looked kind of gross. I told Jerry to come look at this salsa con queso I made. Haha! That's definitely what it looked like. 


I used a cookie sheet with high sides because the recipe called for a long, flat pan. I baked it for 35 minutes and when the timer went off, I was sure I burned it--I couldn't believe how dark it got in the oven! I thought I'd ruined it. But at a closer look, I realized that it was probably supposed to look like that.


I let the cake cool for a little while and then I made the icing. Judging from the ingredients, I was picturing it like a German chocolate cake frosting. But there was nothing to thicken it... so, this is what the icing looked like before I put it on the cake:


It was only then that I realized that the cake would absorb the liquidy icing (you're supposed to put it on there while it's still warm).

I was dying to try a piece, but I let it cool for a while. Then... holy smokes, it was SO GOOD. I texted Jerry at work right away and told him it's the best cake I've ever had.

If I didn't make it myself, I wouldn't have guessed there was fruit cocktail in the cake. It kind of blends in and you don't get the texture of the fruit at all. The cake is super moist because of the icing getting soaked in. I like that the cake isn't really tall--as you know, I like a pretty good frosting to cake ratio ;) 

The cake wasn't very heavy, either--I think it makes a great light dessert! I am definitely going to be making this again. And again. And again.

May 22, 2021

RECIPE: Spicy Chicken Taco Pasta


Unfortunately, I did not make a heritage recipe this week. I am planning to write a menu/meal plan for the week tomorrow, and do all of the grocery shopping. When COVID hit and we were in lockdown, I only went grocery shopping about once every two weeks or so. I got out of the habit of meal planning and making a shopping list, and started buying a lot more convenience foods--not a great habit.

I really want to get back in the habit of planning things out. It saves money and it makes dinnertime less stressful; and of course it's healthier. This past week was very busy and I didn't do any sort of planning for meals, so I didn't get around to making a heritage recipe.

However, I had some chicken in the fridge that I had to use. We had pretty much no food in the house, so I had to get a little creative--and I came up with this pasta. It was delicious! I'm definitely going to add this to a regular rotation.

I like to make my own taco seasoning (it's much more flavorful!); I make a big batch of it and store it in a mason jar to use as needed. So that's what I used in this dish. But you could definitely use a packet of taco seasoning instead. You just might want to add a little water to it. (The homemade seasoning doesn't have a thickener, like corn starch, in it.)


Here is a printer-friendly version!


Spicy Chicken Taco Pasta

Ingredients:

1 (16 oz) box of pasta (I used fusilli)
2 tsp. cooking oil
1-1/2 pounds chicken breasts, cut into bite-size pieces
1 (10 oz) can Rotel (tomatoes with chiles)
1 cup beef broth
1 (10 oz) bag frozen corn
1/3 cup sour cream
4 oz cheddar cheese
3-4 Tbsp. homemade taco seasoning (see recipe below) OR one packet of store-bought taco seasoning

Directions:

Cook pasta according to package directions. Combine all the spices for taco seasoning in a mason jar and shake to mix will. Set aside.

Heat oil in a large skillet over high heat and add the chicken. Cook, stirring, until chicken is browned. Add the Rotel, broth, corn, and 3-4 Tbsp. taco seasoning (depending on how spicy you want it) and bring just to a boil. Reduce heat to medium-low and stir in the sour cream and cheese.

Add the pasta and stir all to combine. Makes about 6-8 servings.

For the Homemade Taco Seasoning:

1/4 cup chili powder
2 Tbsp. ground cumin
2 tsp. salt
2 tsp. black pepper
2 tsp. paprika
1 tsp. onion powder
1 tsp. garlic powder
1 tsp. dried oregano
1 tsp. crushed red pepper flakes (use less, or eliminate, crushed red pepper to reduce heat)

Combine all spices in a jar and shake to mix well. This makes about 9 Tbsp; I like to double it and keep it on hand. Use 2-3 Tbsp. per pound of meat.

September 15, 2020

It's Soup Season! (My Favorite Soup Recipes)


Fall is, without a doubt, my very favorite season. Not because of the pumpkin spice everything (I'm actually not a big pumpkin spice person) but because I love soup. And thankfully, my family does, too. I know it's not "officially" fall for six more days, but I am so excited to post these now :) 

Sometimes, we'll have soup for dinner five times in a week! And because it's so versatile (you can turn pretty much any favorite meal into a soup or stew or chili of some sort), it never gets boring.

I have so many favorites, it's hard to even make a list. But after much consideration, I've narrowed it down to my Top 12 Favorite Soups (in no particular order--I couldn't choose a very favorite!):

Lasagna Soup

Serve this with crusty garlic bread! It's such a simple recipe, but SO delicious. 


I love baked potatoes, but I can never seem to get the texture right. They are either too mushy, too firm, or even rubbery. But this has the perfect texture and combination of all the "loaded" in potato soup and it's seriously SO EASY to make (considering you use frozen potatoes)!


This soup has such the perfect combination of flavors--the sausage and garlic being the most prominent (probably because I add extra garlic). Serve topped with parmesan cheese. So good!


Chicken Taco Soup (in the slow cooker)

This is a go-to when I just don't know what to make for dinner and if I happen to have chicken in the freezer. I don't even thaw it--I throw everything into the crock pot (pretty much zero prep work) and the soup is delicious! I always top it with cheese and Fritos :) Also, this is the tastiest way to get some extra fiber into your diet!


This is more of a soup than a chili. Don't let the photo fool you into thinking it's bland. It's full of flavor and it's absolutely delicious, especially on a cold day. 


Again, this is a go-to recipe when I need something to throw in the crock pot. Split pea soup may not look pretty, but this is my kids' FAVORITE meal. They literally ask for this every week! Allow a full eight hours in the crock pot to get it nice and thick.


This will make your house smell like HEAVEN. I promise! The tomatoes and garlic roasting in the olive oil will make you want to take a bath in it. (Not really, but it's SO good!)


I happen to love Wendy's chili, and I used to eat it in college when I was on Weight Watchers. I would always order a baked potato and chili. Anyway, this recipe actually tastes very much like the Wendy's recipe!


This is the most simple recipe for soup you could possibly make (nearly as easy as opening a can!) but it tastes amazing! Even if you don't think you like lentils, definitely give this a try. The red lentils are much different than the green lentils that you typically see at the grocery store.


I don't know if I've ever even had Max & Erma's Chicken Tortilla Soup, but I tried out a few recipes for it and I love this one. (I cannot remember where I got it, so if you have the original, please let me know so I can give them credit.) This recipe basically involves opening a LOT of cans. Whenever I've made this, I get tons of compliments and several people ask for the recipe. It's almost embarrassing how easy it is!


If you think you don't like lentils, you've GOT to try this! Even meat lovers will enjoy this. In fact, it's one of Jerry's favorite meals! Don't knock it until you've tried it--really.


Turkey, Black Bean, & Corn Chili

This may not look like a typical chili, but it has so much flavor and is super hearty--it's amazing! It's one of my favorite recipes when I'm just not sure what to make--I almost always have all of the ingredients on hand. I like to serve it with sour cream, cheese, and tortilla chips if I have them. But even if you eat it plain, it's so flavorful that you won't miss the toppings!


Featured Posts

Blog Archive