Showing posts with label dessert recipe. Show all posts

February 19, 2022

RECIPE: Cookie Dough Dip

vegan raw cookie dough dip

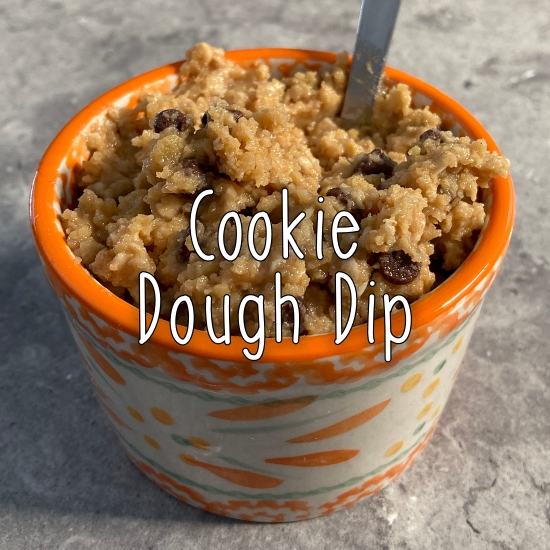
In other words: Peanut Butter Oatmeal Chocolate Chip Cookie Dough Dip. *YUM*

Since I wrote last week that I won't likely being doing many heritage recipes anymore now that I'm eating a vegan diet (to hopefully help with my chronic pain!), I had the idea to try out some vegan recipes and write about those--yes, even the "eww, weird!" ones, haha.

I'm still unsure how to structure these posts; I can't post someone else's copyrighted recipe, but I'd like to try the recipe exactly as written, which is how I was doing the heritage recipes.

So, I was thinking that in the case of copyrighted recipes, I could just list the ingredients here, and then link to the original page with the instructions; that way, people would still have to visit their site to prepare the recipe. If anyone else can think of a better way of doing it, please let me know! (Or if you have your own recipes that you don't mind me posting here--giving you credit, of course--please email them to me and I may try them and post about them.)

This first recipe in this new series was sent to me by a reader (she sent me the link) and interestingly, I already had an almost identical recipe on my blog already--from 2011! The only difference to it is the  addition of oats.

I have to tell you, this sounds like such a WEIRD combination of ingredients and I wouldn't blame you for skipping past this post. However, you will be missing out. Vegan or not, this recipe is amazing! Even Eli loves it, and he likes pretty much nothing but junk food.

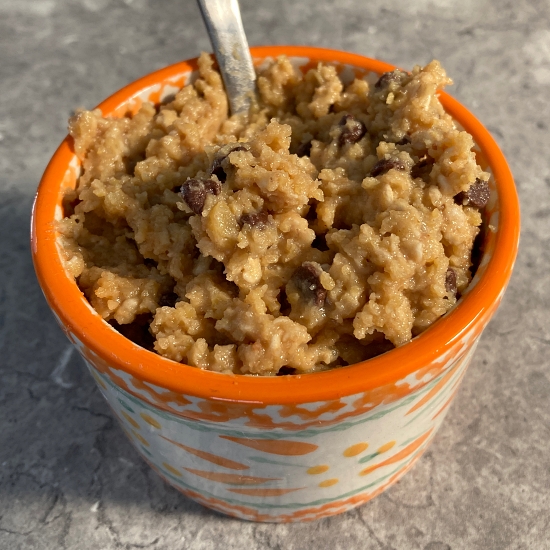
As far as junk food goes, this is actually the healthiest "junk food" I've ever made. While it's technically considered a dip (for apples, graham crackers, or whatnot), I prefer to eat it as is--straight from a little bowl. It's like eating raw cookie dough--peanut butter, oatmeal, and chocolate chip cookie dough. 

vegan raw cookie dough dip hummus

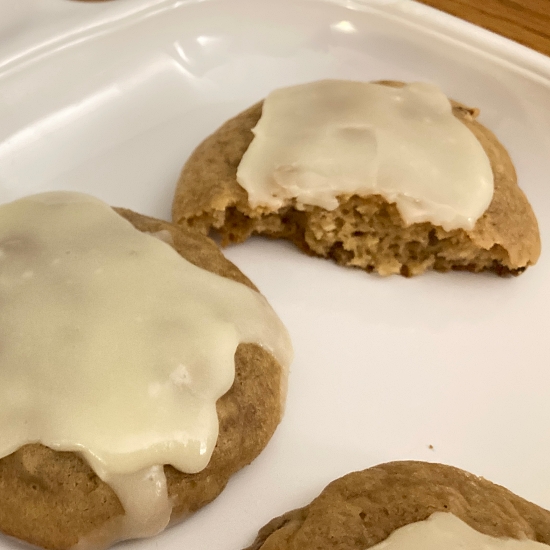
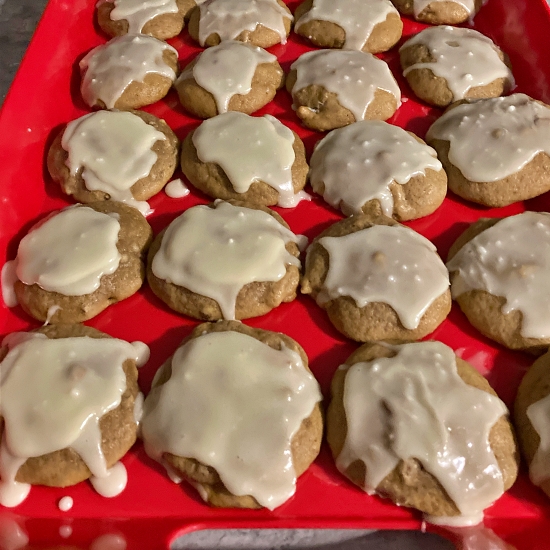
For this recipe, I'm going to combine the two--the one on my blog from 2011 (I redirected that link here to update it) and this one that a reader sent me the link to. That way, I can share the whole recipe (since we prepare the surprise ingredient in different ways). The one that I write out here will be the one that I made yesterday (pictured above) and definitely the one you should try ;)

Since I've started eating a lot of fiber, and now that I'm eating vegan, I've not been eating many sweets at ALL. My options are so limited and it's inconvenient; also, the fiber keeps me full and satisfied. However, I had a mad craving yesterday for something sweet and I decided to take the time to make this Cookie Dough Dip (or, as I called it back in 2011, Cookie Dough Hummus).

The "secret ingredient" in this cookie dough dip is actually chick peas! (Garbanzo beans)

I swear on my life you cannot taste them. 

A note on prepping the chick peas... in the recipe from Tidbits (the one that was linked above, with the oats), she uses a pressure cooker to prepare her chick peas from dried ones. I've never done that, so I can't attest to whether it's worth it; however, the reader who sent me the link to the recipe said it's absolutely worth cooking your own rather than using canned.

I don't have a pressure cooker, so I just used canned chick peas. The Tidbits recipe skips this next step, but I do it because it really does make a difference in the final texture of the dip: I peel the chick peas.

WAIT! Before you click away, it's really not that hard. Just hold a chick pea with your finger tips and then use the fingertips from your other hand to grab the chick pea and give it a gentle squeeze--the skin will come right off. It took me about 10 minutes (where I just sat and watched a TV show while peeling) to peel the whole can.

So, drain and peel the chick peas. Then, here is the recipe for the (vegan) Cookie Dough Dip:

Ingredients

1 can of chick peas, drained, peeled, and rinsed
1/4 cup of natural peanut butter (I LOVE Smucker's natural, but any kind will do)
6 Tbsp. pure maple syrup (you can try using less of this, but I used 6 Tbsp. and it was perfect)
1-1/2 tsp. vanilla
a pinch of salt (roughly 1/8 of a tsp.)
1/4 cup vegan mini chocolate chips (I have the "Enjoy Life" brand and they are great!)
1/3 cup of quick-cooking oats (NOT instant oats, like the flavored packets--but the plain, quick-cooking ones)

Directions

Drain, peel, and rinse your chick peas. This is the most tedious part, I promise.

In a food processor, add the chick peas, peanut butter, maple syrup, vanilla, and salt. Purée until very smooth--you'll have to stop and scrape down the sides of the bowl a couple of times to make sure you don't have chunks of chick peas in it.

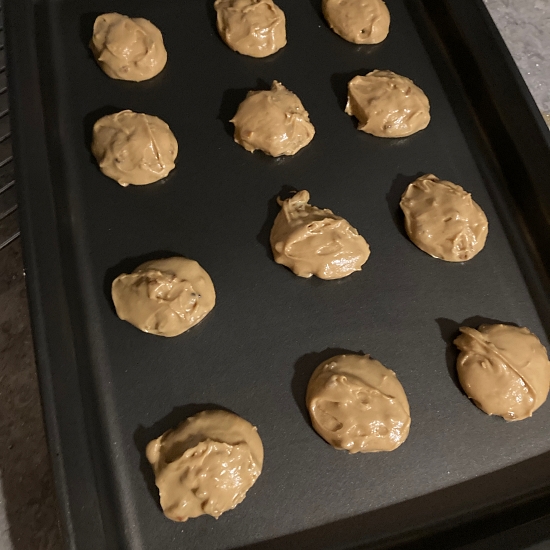
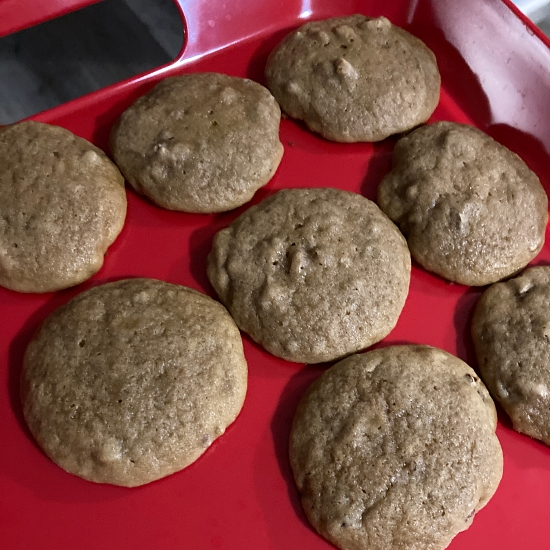
Once it's puréed very smooth (it will have a thin consistency), move it to a bowl and put it in the fridge for about 10 minutes. Lick the spoon so you can see how tasty it is! Then remove it from the fridge and add the oats and chocolate chips. Fold those in well until it's all mixed together. Place it back in the fridge to thicken up. (If it's too thick, just add a little almond milk or soy milk or other non-dairy milk and stir well.)

From here, you can use this as a dip for fruit, graham crackers, pretzels, or even spread on toast; however, I really like to just eat it out of a small bowl. It's like eating raw cookie dough! It tastes like peanut butter-oatmeal-chocolate chip cookie dough.

You can divide it up how you like, but here is the nutritional info for the entire recipe:

Calories: 1294
Protein: 33 g.
Carbs: 177 g.
Fat: 57 g.
Fiber: 19 g.
Iron: 9 g. 

(I was especially interested in the fiber and iron--that's a lot of fiber for a "cookie dough" treat!) If using this as a dip, I would guess it would make 6-8 servings. If you're just eating it as a treat from a bowl, I would say 4 servings. The total recipe made 455 grams--which makes it easy for you to divide accordingly.)

Here is a printer-friendly version of the recipe!

Overall thoughts: This vegan treat is a BIG winner! I hadn't made it in probably 10 years, so I'm really glad that a reader shared a similar recipe with me to remind me of it. I love the addition of the oats--they give it great texture.

The only problem with it is not eating the entire recipe in one sitting ;)

February 12, 2022

HERITAGE RECIPE : Old-Fashioned Pineapple Bars


While going through the heritage book to make something today, I was actually looking for something specific--something vegan. Yes, vegan! I'm not vegan, but I've recently started experimenting with a plant-based diet for a couple of reasons--I'll write about this tomorrow. For now, the reason I chose this was because 1) It sounded good, and 2) It doesn't contain any animal products.

This recipe was submitted to the Rockwood, Michigan Area Historical Society by Margaret Charlesworth. Margaret was born in 1924 and passed away at age 91 in 2016. She worked at the Rockwood Post Office until she married Robert in 1950 and became a "farm wife"--she cared for the cows, germinated seeds, and made sure Robert always knew the weather so he could predict how it would affect the crops. When they had children, she was a full-time homemaker and mother.

Margaret loved to sew and bake. She was actually known as "The Cookie Lady" in her town and was featured in the Monroe Evening News for her baking talent.

Her maiden name was Gay, and I knew I remembered writing about a couple (from a heritage recipe) who lived on a family farm with the last name Gay. After a search of my blog, I discovered that I shared a recipe for Devil's Food Cake from Betty Gay, who happened to be married to Margaret's brother, Samuel. So this recipe was submitted by Margaret, the sister-in-law of the woman who submitted the Devil's Food Cake recipe. (Like I said, Rockwood is a small town!)

I had high hopes for these pineapples bars, considering that they came from "The Cookie Lady!"

As always, I am writing this recipe here exactly as written in the cookbook; the "printer-friendly" version is rewritten by me to include any notes that may need to be in there for clarity. I always make these recipes exactly as they were submitted to the cookbook--no alterations or substitutions. Make sure you check my notes after the recipe.

Here is a printer-friendly version!


Old-Fashioned Pineapple Bars

Mix in Bowl:
1 c. flour
1/2 tsp. salt
1/2 tsp. soda
1/2 c. brown sugar

Add:
1/2 c. Crisco
1 c. oatmeal
2/3 drained crushed pineapple
1 T. pineapple juice

Mix by hand until well blended. Spread in greased 7x11-inch pan. Bake at 350F for 25 minutes. Cool 20 minutes. Frost with 1 cup powdered sugar, 1 tablespoon of pineapple juice. Cut into squares.

My Notes:

The ingredients are very straight forward. Nothing to mention there.

I mixed the first four ingredients (by hand) in the bowl first, then added the rest. It was kind of hard to mix in (it was thick and and there were big clumps of Crisco). I kept mixing though until the clumps of Crisco were gone. I actually thought it resembled canned tuna fish! (The stringiness of the pineapple and the color of the oats made it look that way.


It was kind of hard to spread around the pan because it was very sticky. It felt like a very sticky cookie dough. You may want to oil your hands a bit first to keep it from sticking to your hands while you spread it around the bottom of the pan.


Don't forget to reserve the juice (a minimum of 2 Tbsp.) when you drain the pineapple! I wasn't really sure how well to drain the pineapple--with something like tuna, I squeeze it very hard to get as much liquid out as possible. With this, I didn't want to go overboard, but I didn't want it to be very watery, either, so I just lightly pressed on the pineapple in the strainer before measuring out 2/3 cup of the fruit for the recipe.

I baked it for exactly 25 minutes, as specified, and it looked great when it came out of the oven!


While it was in the oven, I made the frosting. I just added a tablespoon of the pineapple juice to the powdered sugar to make a glaze-like frosting. At first, I couldn't get all of the powdered sugar mixed in with such little liquid. I added about 1/2 tsp more and it worked. This is the texture it made--thicker than I thought (it wasn't pourable--it was thick and needed to be spread around)


I set the timer for 20 minutes when I pulled it out of the oven, and after 20 minutes, I spread the frosting all over it. It was actually the perfect amount of frosting/glaze!

I started to cut into it but it was really sticking to my knife, Then I realized I should probably wait until it was completely cool. So I set it into the fridge to allow it to cool quickly.

A couple of hours later, it cut MUCH more easily. I cut it into 12 squares.


At first, I wasn't sure how I felt about them. I thought they were a bit bland--I didn't get a pineapple flavor at all. The texture was pretty dry and somewhat crumbly. I only took one bite and just left it alone after that. However, a few hours later, I took another bite, this time at room temperature--and I really liked it that time. The flavor is very subtle-and definitely not too sweet--so if you're looking for a light dessert, this may be a good choice. The texture is kind of a cross between cake and oatmeal cookies.

My family reported the same thing when they ate them; they the bars weren't anything to rave about, but they were okay. I don't think I'd make them again. But for an unintentionally vegan recipe, I was surprised at how well they turned out!

If you're curious about the nutrition info: one square has 144 calories, 1 gram protein, 15.5 grams carbs, and 9 grams of fat.

I'm going to look through the book and see if there are any of her cookie recipes!

January 22, 2022

HERITAGE RECIPE : Sweetheart Coffee Cake


When looking for a heritage recipe this week, I found one that was called "Sweetheart Coffee Cake"--and since Valentine's Day is coming up, I thought this would be a great recipe to try!

Now, I am the first to admit that I did a terrible job with the presentation! Hahaha, it's not nearly as pretty as I hoped it would be. But hey, if it tastes good, that's what matters most.

You'll see there are two different versions that I made, and I'll explain that in my notes after the recipe.

This recipe was submitted to the Rockwood, Michigan Area Historical Society by Peggy Laginess in memory of her mother-in-law, Helen Laginess.

Now, when I googled Peggy and Helen, I discovered something very interesting. I read Peggy's obituary which named one of my uncles (my mom's older brother) as a surviving relative. This is confusing, but here is what I learned:

Peggy (who submitted this recipe) was married to Robert (who has passed away).
Robert had a sister named Lorraine.
Lorraine is married to Dan--and Dan happens to be my mom's brother (my uncle).

I'm not sure how that makes me a relative to Peggy (through marriage), but I found that interesting! Anyway, Peggy submitted this recipe for Sweetheart Coffee Cake in memory of her husband Robert's mother, Helen. Helen was born in 1912 and passed away in 1997 at age 85.

As always, I'm copying the recipe here exactly as-written in the heritage book and I made it without modifying or substituting anything. If anything was unclear, I made my best judgment and I wrote about it in my notes. (The "printer-friendly" version below is re-written by me with my notes included.)

Here is a printer-friendly version!

Sweetheart Coffee Cake

3-1/2 to 4 c. flour
1/3 c. sugar
2 pkg. RapidRise yeast
2 tsp. salt
1/3 c. butter
2/3 c. milk
1/2 c. water
2 eggs

Set aside 1 cup flour. Mix flour, sugar, yeast and salt. Heat together water, butter and milk until hot to touch. Stir hot liquid into dry mixture. Mix in eggs. Mix in enough reserved flour as necessary to make a stiff batter. Knead on floured surface until smooth, about 5 minutes. Place in greased bowl and cover; rest 10 minutes. Divide dough in half and roll out 1 portion to 15 x 10-inch. Brush with 1/4 cup melted butter. Combine filling and sprinkle 1/2 of it over dough. Roll up as jellyroll from long side. Place on greased baking sheet. Fold half of roll on top other half; seal ends together. Starting at folded end, cut lengthwise down center of roll with scissors to within 1-inch of sealed end. Turn cut halves outward, cut side up, to form a heart. Repeat with remaining dough for second loaf Cover and let rise until light and doubled in size, about 45 minutes. Bake at 350 F for 20 to 25 minutes; remove from baking sheet.

My Notes:

Okay, lots of notes here! The biggest issue I had with this recipe, which almost kept me from trying it, was the fact that there isn't any specification of what the "filling" should be. The recipe just states, "Combine filling and sprinkle 1/2 of it over dough..." but there is nothing anywhere stating what the filling is.

From what I know of coffee cake, the filling is usually a cinnamon + sugar mixture. So, I decided to go with that. However, since there were two loaves, I thought it might be fun to make one red (for Valentine's Day) by using strawberry jam for a filling. Jerry thought it was a good idea, until I prepped the loaf and he said it looked like I was making a vagina--hahaha!


In total, I probably ended up using 4 cups of flour (including the flour I spread on the counter to roll the dough).

I heated the water, butter, and milk in the microwave; I probably should have used the stove, considering this is such an old recipe, but I made sure to stir it often and make sure it didn't get boiling hot.

Rolling out the dough was very easy once I had enough flour mixed in. I made it as rectangular as I could.


It took a lot more jam than I thought it would--probably about 3/4 cup to 1 cup? (It looks like ketchup, I know!)


For the one with the cinnamon + sugar mixture, I melted 1/4 cup of butter as specified in the recipe, and then liberally sprinkled with a combination of the cinnamon and sugar. (I keep cinnamon and sugar mixed together in a shaker jar--probably a 4:1 sugar to cinnamon ratio?). I made sure to spread the butter and the cinnamon mixture all the way to all the edges.


To roll it, first, you start at the long edge. You roll it up tightly (which is kind of hard because it's slippery with the filling). 


Then I put the seam-side up, took one end of the roll and folded the roll in half (with the seam sandwiched in the middle) and I pinched the two short ends together. 


Then, starting at the fold, you use scissors to cut through both layers of the roll. The sides will just kind of fall into position, but it basically looks heart-shaped when you're done.


The recipe specified to cut to about an inch from the short (pinched) edge, and after taking the photo above, I ended up cutting it a little farther because it didn't seem like it was cut far enough.


I baked the one with jam for 22 minutes before deciding it was done, and then set the timer for 22 minutes for the cinnamon + sugar one. I think I baked that one too long--I should have only done 20 minutes. It didn't burn though.


I was very surprised to discover that I liked the one with jam better. I'm usually not a jam person, but I liked that it was more moist and I thought it had more flavor. The cinnamon + sugar one was pretty dry. It definitely needed some frosting! ;)


Overall, I wasn't crazy about these Sweetheart Coffee Cakes. I wouldn't make them again. (And I actually wasn't even tempted to eat more than a couple of bites to taste-test.) Maybe I'm just missing out on an amazing filling that I don't know about--I'm super bummed it wasn't in the book!--but everyone in the family thought they were just okay. And definitely not pretty enough for Instagram or Pinterest photos!

If you happen to make this and have better luck with the filling and/or the presentation, please email me a photo! I'd love to see.

January 15, 2022

HERITAGE RECIPE : Scottish Shortbread


First, I have to admit that this is a total cop-out of a recipe. There are only four simple ingredients and not much work at all.

However, I am in a terrible mood today and I just don't feel like getting into a big mess with a recipe right now. 

I would like to thank Kroger Pharmacy for filling my prescriptions two days late; when you're on mood stabilizers and anti-anxiety meds and suddenly cut off from them, things can become a shit show after just one day. Just ask Jerry. I think he was excited to go to work today just to get away from me.


I understand that everything is slower right now, but I get the same meds every month and these were sent in with plenty of notice. Cutting someone off cold-turkey isn't cool.

Anyway, I feel terrible that this is how I am starting this heritage recipe! Heritage recipes are supposed to be light and fun. This recipe was submitted by Sharon Laura to the Rockwood, Michigan Area Historical Society. I promise that I will do her justice by finding another of her recipes and making up for it.

To make me feel even worse, Sharon is the daughter-in-law of my school bus driver that I had (and loved) all through elementary school! I would love to write a little about her, and I will do that in another post (she has submitted recipes as well, so I'll pick one of hers).

For today, though, I picked (what I thought was) a simple recipe. I almost managed to screw this up, though, because it started to crumble apart when I tried removing it from the pan (turns out I had to let it cool first)

As always, I made the recipe exactly as-written. I didn't make any substitutions or alterations. The "printer-friendly" version below is rewritten by me with any notes to clarify things.


Scottish Shortbread

1-1/4 c. flour
3 T. cornstarch
1/3 c. granulated sugar, divided
1/2 c. butter

Combine 1/4 cup sugar, flour, cornstarch and butter. Rub with fingers; press into ungreased 8-inch pan. Bake at 325 F for 40 minutes. Cut into wedges; sprinkle remaining sugar on top.

My Notes:

Simple enough, right? I mixed the ingredients in my mixer and then squished it all together with my fingers. The dough was REALLY dry and I never thought it would come together, but it did--barely. This is what it looked like before and after smushing it with my fingers.


And then after pressing it down to the bottom of the pan...


It looked pretty much the same after baking as it did before baking...


Getting it out of the pan was ridiculous. The whole thing just started crumbling apart. I wondered if I was supposed to let it cool first before removing it from the pan. So I tried to smush the crumbled part back in there, and then I let it cool. (You can see on the left where I started to try to lift it out and it crumbled apart on me.)


It worked out MUCH better after it cooled. In fact, it was absolutely delicious! It was very buttery tasting and not super sweet. It would be amazing served with some strawberries on top.

Anyway, I apologize to Sharon for my sour mood. I will try making this again when I am in a better mood and maybe I'll do better at it. I'm really looking forward to making one of Sharon's mother-in-law's recipes as well!

Don't let my bad mood stop you from trying this recipe--it really is delicious!  (And if you need a super fast, easy dessert for last-minute company or something, this is perfect. Just serve it with some fruit and it'd be really pretty!

December 19, 2021

HERITAGE RECIPE : Grandma's Jumbles


Well, the third time was a charm! (Third recipe, in this instance.) After two failed recipes yesterday, this one was a winner.

The name "Grandma's Jumbles" is what caught my eye while I was flipping through the heritage cookbook. I've never heard of jumbles before, but the recipe made it pretty obvious that they were cookies. I happened to have the ingredients on hand, so I baked these last night.

The most fun part about this recipe, though, was learning about the person who'd submitted it. This recipe was submitted by Betty McWebb to the Rockwood, Michigan Area Historical Society. The name didn't mean anything to me until I learned that Betty was also known as "Aunt Bett" as well as "Elizabeth Upham" (her maiden name). Are any of you familiar with the old children's book Little Brown Bear? It was published in 1942 and was written by none other than Elizabeth Upham. How awesome is that?!


Elizabeth Upham was born in 1904 on a farm in Flat Rock, Michigan (which neighbors Rockwood). Her father was a storyteller and her mother a poet; so it's not a surprise that Elizabeth was a creative writer and storyteller as well. (She signed her poetry "Betty" from early on, so I will refer to her as Betty from here on out.)

In the 1920's during Prohibition, Betty wrote this limerick which I think is hilarious:

Once Mable found dear hubby Jack,
Rejoicing that whiskey was slack,
But when mending by chance,
She found in his pants,
Five tickets to Windsor and Back!

(The Downriver area is only about 20 minutes from the Windsor, Ontario border. This made me laugh because the legal drinking age in Canada is 19 and when I was in college, it was a common thing to cross the border to go to bars. I remember doing that several times.)

Betty became a teacher in 1937 and married her husband "Mac" in 1940. She was a talented poet and storyteller, sharing her stories with all who would listen (and people loved them!). She sold her poems in the 1930's, and then in 1942, her first children's book 'Little Brown Bear' was published. The book is a series of ten short stories about life lessons for kids told through the eyes of a "little brown bear".


Betty was affectionately referred to as "Aunt Bett" by all who knew her and listened to her stories. In the 1950's, a group of children would gather at her house to hear her stories; she also told stories at the libraries and at the County Fair. She also taught Sunday School and Vacation Bible School.

She clearly loved children. Sadly, she and her husband lost their only child, a baby girl named Mary Ann, shortly after she was born in 1941.

Something I searched for and just couldn't find was the significance of was "Grandma"--as in, "Grandma's Jumbles". I don't know if she was referring to her own grandmother or if it was in reference to one of her stories. I read that in a past exhibit at a museum in Monroe, there were two life-sized papier mâché dolls that she'd made when she was young--one she referred to as "Grandma" and the other was of a favorite teacher. Odd! And I wish the exhibit was still there, because I would definitely go look at it.

Aunt Bett passed away at age 99. She was clearly well-loved by everyone in the community; it was fun to read about her!

Now, on to the cookies...

Grandma's Jumbles were a hit with Jerry and me. Noah and Eli thought they were just okay, because of the texture--it's more cake-like than your typical cookie (which I imagine is because of the condensed milk; that's the only ingredient that I don't usually see in cookies). I usually like chewy cookies as well--the chewier the better--but these were good! The texture actually reminded me of a light, fluffy quick bread. (This picture is a little blurry, but you can kind of see the texture.)


They definitely take on the taste of the nuts you use (I used pecans) so make sure you use a nut you love. She also stated you could use dates or raisins instead, but in the directions, she specified nuts; so that's why I chose to use those. And pecans are my favorite nuts in baking. These would probably be good with almonds, too!

As always, I made the recipe exactly as-written; I didn't substitute or modify anything. If something was unclear, I just made my best guess; make sure you read my notes after the recipe for any clarifications. The "printer-friendly" version is rewritten by me with the clarifications included.

Here is a printer-friendly version!


Grandma's Jumbles

1/2 c. soft shortening
1 c. brown sugar, packed
1/2 c. granulated sugar
2 eggs
1 c. evaporated milk (undiluted)
1 tsp. vanilla
2-3/4 cups sifted flour
1/2 tsp. soda
1 tsp. salt
1 cup chopped nuts, dates, or seedless raisins

Cream shortening thoroughly until fluffy. Blend in sugars and eggs and beat until smooth; stir in milk and vanilla. Sift flour, soda and salt. Add to creamed mixture and beat until blended. Add nuts and chill for one hour. Drop rounded tablespoons two inches apart on greased baking sheet and bake at 375 F for about 10 minutes. Burnt Butter Glaze: Heat 2 tablespoons butter until golden brown on low heat. Remove from heat and beat in 2 cups sifted confectioners' sugar and 1/4 cup evaporated milk.

My Notes:

All of the ingredients were self-explanatory. Note that it's one CUP of evaporated milk and not one CAN. I almost poured the entire can in, and I'm glad I double-checked before doing that. (You'll use 1/4 cup of what's left later for the glaze).

I chose to use nuts--pecans--rather than dates or raisins because from the directions, it sounded like she used nuts. ("Add nuts and chill...")

The dough was definitely more like a batter when I was done and I wondered if I didn't add enough flour or something. There was no way to make drop cookies from it! After refrigerating for about 90 minutes, I pulled it out and it was thicker. It still was thinner than most cookie dough I've seen, but I was able to scoop and drop it onto cookie sheets.


I took them out after 10 minutes and they looked perfect--just barely baked through (I like cookies on the slightly-underbaked side).


I wasn't sure if I was supposed to drizzle the glaze all over or put a dollop on each cookie or what, so I just scooped a little spoonful and spread it right in the middle of the cookie--it ran down the sides a bit. I don't think it looked very attractive, but it definitely tasted good!

One thing I forgot to do was sift the powdered sugar before adding it to the butter. I'm bummed I did that, because it left some tiny clumps of powdered sugar in the glaze. It tasted fine, but it would have looked better if I'd sifted it first. You can see what I'm talking about below:


Overall, this recipe was a winner! I would definitely make these again. If you really don't like cookies with a cake-like texture, you probably won't enjoy them; but I always taste these recipes with an open mind and I really liked them. Jerry did, too!

And I'm SO glad I learned about Aunt Bett. (I'm sure if any of my local friends read this, they are going to be like, "Are you SERIOUS? You never knew about her?! There is a huge 9-ft. statue of a bear in front of the library that is dedicated to her." I just don't know how I missed this! ;) But I do remember the Little Brown Bear book.

This post is only a very tiny glimpse of who Aunt Bett was and all she meant to the community. I got this info from The Monroe News, The Toledo Blade, and Monroe Memories & More.

November 27, 2021

HERITAGE RECIPE: Autumn Cheesecake


This recipe definitely tugs at my heartstrings a bit. I'd decided to make a recipe from my grandma's cookbook (we called my grandma Gobby, and she lived from 1914-1999). My Aunt Mickey had put together a cookbook for all of the women in the family where she'd photocopied my grandma's handwritten recipes (and typed them out because my grandma's handwriting was very difficult to read! haha).

I was flipping through the book when "Autumn Cheesecake" caught my eye. 'Tis the season, right?

I saw that I had all of the ingredients except for allspice. And I didn't have a springform pan. That's where my mom came to the rescue. So I was excited to make this cheesecake! It wasn't until I was halfway through mixing the ingredients that I noticed the recipe said, "From the Kitchen of: Kim Forster".

Kim is my Aunt Mickey's daughter (Gobby's granddaughter and my cousin). Tragically, Kim passed away from cancer in October of 2005, when she was only 42 years old.

It was heartbreaking in the worst way. I've written about my Aunt Mickey here before (remember the post about poached eggs?) and Kim was just as sweet and loving and caring as her mom. She had three daughters who were young pre-teens at the time she passed away. They have an amazing dad who managed to continue to raise them to be every bit as compassionate as their mom. I'm not exaggerating even the tiniest amount about how wonderful their family is!

A fun fact about Kim is that she was a contestant on the show "Who Wants to Be A Millionaire?" hosted by Regis Philbin. (It was in Season 3, Episode 209.) She was on the show shortly after being diagnosed with adrenal cancer. You could tell just by watching her on the show how sweet she was!

Kim was quite a bit older than me (my mom was the youngest of six kids, and my Aunt Mickey was Gobby's third child). When I was growing up, I was very close with Kim's daughters. Here is a photo of my Aunt Mickey, Kim, me, and Kim's oldest daughter right after she was born.


I didn't learn this until after she passed away, but Kim was also an avid runner. At her funeral, people kept saying that they remember her running and always smiling while she was running. At the time, I knew nothing about running, but how cool would that have been to have that in common with one of my favorite cousins? Kim ran even through her cancer treatment; she ran until she was physically unable to run anymore. That's how much she loved it.


One thing about Kim that I will be forever grateful for happened shortly after I had Noah. I wanted to breastfeed and I had planned on it through my whole pregnancy. However, after he was born, my milk never came in. I was so upset and frustrated. The lactation consultant was not at all helpful and was actually really rude to me when I was crying on the phone asking for advice.

Kim was a labor and delivery nurse, so I called her to ask if she could help. She was so calm and reassuring that I was doing everything I could for my baby. It turned out that my milk never did come in (with either of my kids) but that conversation with Kim made me feel like I was still a good mom even though I couldn't breastfeed.

Two of Kim's daughters are now nurse practitioners and one of them is a talented runner, just like she was. My mom told me that Kim's oldest daughter loves to make cheesecakes; she didn't know if this was because of Kim, but I love that I chose to make this recipe today. I'm saddened that this recipe was not the typical heritage recipes I post--where the recipe is handed down through generations. But I love that it made me think of not only my grandma, as I saw her handwriting in this book, but my beloved cousin Kim as well.

So, here is a recipe for Autumn Cheesecake; handed from Kim to Gobby.


As always, I made this recipe without modifying or altering it in any way. I want to see why it was so special to Gobby to ask Kim for the recipe! Here is the recipe copied exactly from the one Gobby wrote above; the "printer-friendly" version is re-written with my notes/clarifications.

Here is a printer-friendly version!

3/4 C vanilla wafer crumbs
1/2 C chopped walnuts
6 T. melted margarine
2# cream cheese
1-1/2 C sugar
1/3 C flour
2 tsp. cinnamon
1 tsp. nutmeg
1/4 tsp. allspice
6 eggs
1-1/2 C canned pumpkin

Preheat oven to 325 degrees. Grease bottom and sides of 9" springform pan. Combine wafter crumbs, nuts and margarine. Press to sides and bottom of pan. Chill. Combine cream cheese, sugar, flour and spices. Add eggs. Add pumpkin and blend well. Bake 90 minutes, then turn off heat and let stand in oven 30 minutes longer with the door open. Cool on rack and chill.

My Notes:

First, I want to state the obvious: this is the ugliest cheesecake anyone has ever seen. But that is NOT the fault of the recipe! 


After I made it, I realized what I'd done wrong...

1) I forgot to set the damn timer when I put it in the oven! I tried to figure out how long it had been in the oven based on when I started writing this post (which was shortly after I put it in the oven) but I didn't know for sure. And cheesecake is finicky. It turns out that I most likely over baked it.

2) I think I also mixed the batter too long, which made it too airy. That could be a reason why the cake split in the middle (along with over-baking). I read later that you are supposed to add the eggs last (which I did) and mix minimally after that so that the batter doesn't get airy (which causes the cake to be unstable and crack). I didn't know that I wasn't supposed to mix it very long.

More notes:

I crushed the vanilla wafers and walnuts separately in order to get the correct amount. (Rather than put the wafers and walnuts (whole) in the food processor together.)

When I pressed the crust mixture into the pan, I was a little worried that there wasn't enough to cover even the bottom, let alone the sides. I know most cheesecake only has crust on the bottom and a tiny bit of the sides--so I just hoped that was the case here, because I certainly didn't have enough to put it up the sides.

I used a stand mixer with the whisk attachment to mix everything. The recipe is pretty straight-forward about the ingredients and directions.

The baking part was new to me--turning off the heat and then letting it sit with the door open. I found it interesting!

Jerry and I tasted the batter and we were blown away--it tasted exactly like the seasonal Ben & Jerry's Pumpkin Cheesecake ice cream. We LOVE that ice cream. Seriously, we stalk the stores in the fall and hope we can find it and then we buy several of them, knowing that we won't get them again until next year!

I was a little worried about how much batter went into the pan. It was VERY tall and I wasn't sure if it was going to bake all the way through. When I checked on it later, I was shocked to see how much it rose in the oven!


I knew that when cheesecake cracks like the picture above, there is something wrong. So that was when I knew I'd over-baked it. I was super bummed! I wondered if I did something wrong, but I just trusted the recipe and if not for forgetting the timer, it would have turned out perfectly. 

As the cheesecake cooled it deflated a bit, which is what I imagine it's supposed to do. I put it in the fridge and hoped it would magically put itself back together and then be beautiful for a picture. No such luck.

BUT--it turned out to taste simply amazing! We had a few friends over tonight, and everyone agreed that it was really good. It looked better in slices than it did as a whole, haha. 

I will definitely be making this again. And I will definitely remember to set the oven timer. And of course, I will think of Kim.

November 20, 2021

HERITAGE RECIPE: Pumpkin Bars


"This is the best heritage recipe you've ever made!" -- Jerry, as he's eating his third bar in a row.

Jerry and the kids LOVED these (as did I). I knew that they were great when Jerry said he liked them better than pumpkin pie. Pumpkin pie is his favorite! And honestly, these bars really are the perfect dessert (not just for Thanksgiving, but any time). I had told Jerry he could take them to work tonight (so I don't eat them all) and the kids said, "No! Keep them here." 

This recipe was submitted to the Rockwood, Michigan Area Historical Society by Joan Pickens. I searched, but found absolutely NOTHING about her online; usually, I'll find a relative or obituary or something and then go searching that way. But I just can't find anything about her, unfortunately. 

I chose this recipe simply because I wanted to make something festive for Thanksgiving-time, as long as it wasn't pumpkin pie. I love cream cheese frosting, so that's what pulled me in. It was actually the bars, however, that had me saying WOW.

As always, when I make these recipes I don't alter or substitute anything--I try it exactly as-written. Here, I am writing it word-for-word, but in the "printer-friendly" version, I've typed it out to include my own notes.

I don't normally write "You have to make this!" on my recipes posts, but I am going to state that here: YOU HAVE TO MAKE THIS. The bars have this perfect texture that is hard to compare with other foods. It's dense and spongy, kind of like a very moist spongy pound cake. The cinnamon gives it the festive-pumpkin taste without being too "pumpkin spice-y". (Yes, I'm making up words.) And I don't even have to describe the cream cheese frosting--YUM.

Just make these bars--you will be so glad you did!

Here is a printer-friendly version!

Pumpkin Bars

2 c. sugar
2 c. pumpkin
4 eggs
1 c. oil
2 c. flour
2 tsp. baking soda
1 tsp. cinnamon
1/2 tsp. salt

Mix by hand in a large bowl the pumpkin, sugar, eggs, and oil. Add flour, mixed with soda, cinnamon, and salt. Grease and flour a 15x10-inch jelly roll pan. Pour in mixture and bake 25 minutes at 350 F. (Do not overbake.)

Grease and flour a 15x10-inch jelly roll pan. Pour in mixture and bake 25 minutes at 350 F. Do not overbake. (I did mine for exactly 25 minutes and it didn’t look “done” to me—but I pulled it out anyways and it was PERFECT.) Allow to cool completely before frosting.

Cream Cheese Frosting:

6 oz. softened cream cheese
2 sticks softened butter or oleo
2 tsp. vanilla
4 c. powdered sugar

Mix with mixer.


My Notes:

All of the ingredients are very self-explanatory. I used canned pumpkin in the bars since it didn't specify that. For the frosting, I used butter (just because it tastes better).

The mixture had the texture of a thick cake batter when I poured it into the pan.


It was interesting--I set the timer for 25 minutes, because it said not to overbake, and it definitely didn't look "done" to me when the timer went off. However, I pulled it out anyways, and later, I learned that it was perfect just the way it was. So, set your timer for 25 minutes and pull it out no matter what you think when you see it. It won't look much different than when you put it in!


Just trust the recipe!

The frosting was easy to make--I just threw the ingredients in the mixer and let 'er rip until it was the fluffiest, most delicious cream cheese frosting ever.

I put (most of) it on the bars (I'm embarrassed to say how much frosting was "leftover" in the mixing bowl, hahaha).


(Yes, that is a skeleton hand in the background. He's sitting at the snack bar.)

I cut it into 20 pieces; the bars are pretty thick, so each piece is pretty satisfying. Except you'll still want more because it's just so good! Seriously. Go make these!

November 06, 2021

HERITAGE RECIPE : Grated Raw Sweet Potato Pudding (A Very Old Southern Recipe)


I will start by saying that this should definitely just be called "Sweet Potato Pudding" because the "grated raw" part is a bit of a turn off. However, it was that wording that caught my eye when I was looking through the heritage recipe book. And I'm so glad I chose it, because it turned out to be delicious!

With Thanksgiving coming up, the sweet potato dish sounded like the perfect dessert to try--a change from sweet potato casserole (my favorite Thanksgiving dish!!) and sweet potato pie. I highly recommend adding this to your Thanksgiving dinner spread!

This recipe was submitted to the Rockwood, Michigan Area Historical Society by Jeanette Herzog. From what I could find, it seems Jeanette is still living; she's actually the vice president of the historical society! In 2007, she and her husband celebrated their 50th wedding anniversary.

I'm not sure of story behind this recipe, but she wrote the title of it like this:

GRATED RAW SWEET POTATO PUDDING
(A Very Old Southern Recipe)

So, perhaps the person who handed it down to her was from the south. Regardless, I'm glad it made its way north, because it's really delicious!

This pudding tastes a lot like rice pudding, only it's a bit sweeter. The texture is actually similar, too. And if I had bought orange sweet potatoes, I'm sure it would be much prettier! (It kind of looks like cheesy hash brown potatoes, haha). 


I had no idea that there was such a thing as white sweet potatoes. When I was grocery shopping, the organic sweet potatoes were actually cheaper than the non-organic ones, so I chose to get those. All it said was "organic sweet potatoes"--nothing about them being white!

So, I was a little bummed when I peeled them and they weren't the beautiful orange color I'm used to, but they taste the same.

Okay, so as always, my rule for making recipes from the heritage cookbook is that I cannot make any modifications or substitutions in the recipe at all. Here, I've typed it out exactly as written in the book (the "printer-friendly" version is rewritten with my notes included). Make sure you read my notes below the recipe for any clarifications.

Here is a printer-friendly version!

Grated Raw Sweet Potato Pudding

3 med. eggs
1 c. sugar
1-1/2 c. milk
1/2 c. melted butter
2 tsp. vanilla
1/8 tsp. salt
3 c. grated raw sweet potato (reserve 1 c. for crust)

Preheat oven to 350 F. Beat eggs, add sugar and milk, butter, vanilla and salt. Add 2 cups potato. Place in 2-quart baking dish. Sprinkle reserved cup potato over top. Bake 25 minutes. Serves 6.

My Notes:

First, the eggs. I didn't notice that it called for medium eggs; I always buy large eggs. So, I googled the weight of a medium egg and then picked the smallest ones I could find in my package of large eggs; it turns out that they were the perfect size for a "medium" egg. (I'm not sure it matters, but like I said, I don't want to alter anything.)


I bought three sweet potatoes, not sure how many it would take to get three cups of grated potato. It turns out that three is way too much! I grated two of them (in the food processor) and it was packed full. I only ended up using about half of that. So, I'd guess that one large sweet potato would work for the three cups called for in the recipe. (I weighed out the shredded sweet potato just out of curiosity, and each semi-packed cup weighed 110 grams, or 1.4 pounds.)

Also, the recipe didn't specify peeling the potatoes, but I think that is common sense.


Everything was pretty self-explanatory. Here is what it looked like before I put it in the oven... (Because the sweet potatoes are white, it looked like a lot of cheese!)


After 25 minutes, it barely looked any different and was still VERY liquidy. So, I put it back in and I set the timer for 10 minutes. Still, the center was not set. 10 more minutes. Nope. Finally, another 10 minutes did the trick and the center was set (very soft-set, but it wasn't liquid). So, you'll probably have to bake for close to an hour.


When I scooped out some pudding, I noticed a lot of liquid on the bottom of the dish--it was clear liquid, so it wasn't due to being under-baked; I think the liquid was from the sweet potato. (After some googling, I am pretty sure that's correct.) When using raw sweet potatoes, the liquid is released into the dish as it cooks. The liquid was extremely sweet--almost like a syrup--so it wasn't gross or anything.

Definitely allow the pudding to cool completely before serving, and then stir it well and the liquid will be absorbed into the pudding. Mine was still warm when I scooped some out, so there was a lot of liquid. Later on, after it sat for a couple of hours, the liquid was easily stirred into the pudding.

I don't think that this dish needs cinnamon or any sort of spices; I think it's perfect as-is! It's a great Thanksgiving dish :)

Featured Posts

Blog Archive