
Finally--I have bathroom photos! As you know, this was part of the nightmare that was 2022. I finally took the time to take "after" pictures and put together this "before and after" post for the unplanned bathroom makeover remodel. I'll try to sum the project up in a nutshell long post with fifty billion pictures.
Jerry was going away for the weekend at the end of July, so I thought I'd surprise him by getting rid of the carpet in our bedroom and replacing it with the same luxury vinyl planking we have throughout the house. We had extra boxes of it and it's a simpler project than you might think, so I knew I could knock it out in a weekend. Ha! Last words.
 |
| Just getting started with tearing out the carpet |
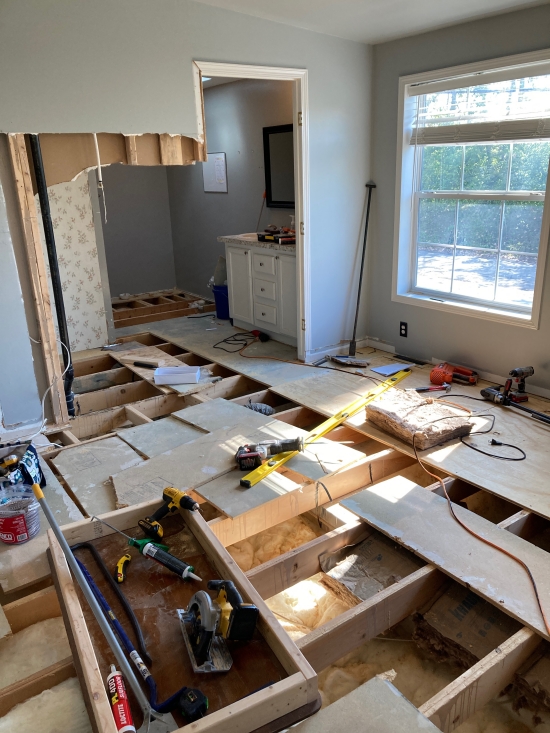
I was excited to pull up the carpet and get started. I even took "before" photos, thinking it was just going to be the flooring I would be replacing. Well, when I got to the side of my bedroom that shares a wall with the master bathroom, I discovered what would become a huge headache for the rest of 2022. The shower was just on the other side of the wall, and apparently, it had been leaking for a while. The floor was rotted and there was quite a bit of water damage. (I couldn't see how far it went, but I assumed it was under the entire shower.)

I consulted my older brother, Brian, because he's been doing construction (not as a profession, but more as a serious hobby) since his late teens. He made it sound like it wasn't a huge deal, that I could just tear out the flooring under the shower and replace just those couple of pieces. However, I didn't like that the floor in my bedroom was "wavy". It felt uneven, and after pulling up the carpet, I could see why.


Brian said we could use some sort of leveler product that basically fills in the low spots on the floor, but I decided I wanted to just redo the entire floor the "right" way--using sheets of plywood instead of particle board. And I wanted to do the entire bathroom and bedroom.
And since we were going to be pulling up the subfloor, it was going to mean lots of reconstruction--so I might as well give it a makeover, too! I knew I wanted to move the shower to the opposite corner of where it was. We used to have a large corner tub there but we pulled it out because we never used it. Actually, here is a (very cringy!) photo of it when we first moved in:

So, the space was pretty large and empty. I figured we could move the shower there (especially since the pipes were already there from the tub) and then I could build a small closet where the old shower used to be.
We tore out the old shower, as well as the wall that divides the bathroom and bedroom. The floor damage was right under it, so it was a lot easier to take out the wall to redo the floor. Then we spent a gazillion hours pulling out staples and ripping out the subfloor that was glued down.

 |
| I was SO excited to get rid of this old shower! |
 |
| Jerry tearing apart the shower (well, with a saw, haha) |

I kind of panicked after that--we didn't have a floor in our bedroom or bathroom! There was insulation and then crawl space.
 |
| Jerry fell through into the crawl space, and popped up with a small lever tool I'd lost forever ago! |
 |
| When chipping away at glue and particle board, the dust gets EVERYWHERE. |


You know, in the Three Little Pigs story, they never did have someone build a trailer. A house held together with glue and nails like this, well, it ain't coming apart for ANYTHING. While remodeling the house, nails have been the bane of my existence. After drywall dust, of course.
I was picturing spiders and raccoons and stuff all coming up through the floor. We spent the next few days replacing the subfloor so that we could at least bring our mattress back in the room. I'd been sleeping on the couch and Jerry was working nights--sleeping in Eli's room while Eli was at school.
I don't remember the order we did everything, but basically, I had to remove the old floor, add more insulation, install new subfloor. Build a dividing wall between the bedroom and bathroom. Build a closet. Install a bathtub/shower combo with surround wall and all the drywall. Install new lights and a new bathroom fan. Build a "cat hangout" on top of the bathroom closet with a hole that leads into the bedroom. Install new trim and a new bathroom door. Prime and paint everything. I did all of this while Jerry was at work or sleeping, and he did all of the floor planking.

 |
| Privacy is overrated. |
 |
| We slept like this for a long time! The bathroom was the priority, not the bedroom. |
 |
| No shower at all meant that we had to share with the boys. My 17- and 18-year old teen boys. Gross! |


 |
| My first "wall"--hey, you have to start somewhere, right?! This would become the closet wall later. |
 |
| Installing the new tub/shower combo in the back right corner. |
 |
| I built another wall! This one was to separate the bathroom and bedroom again--yay. |
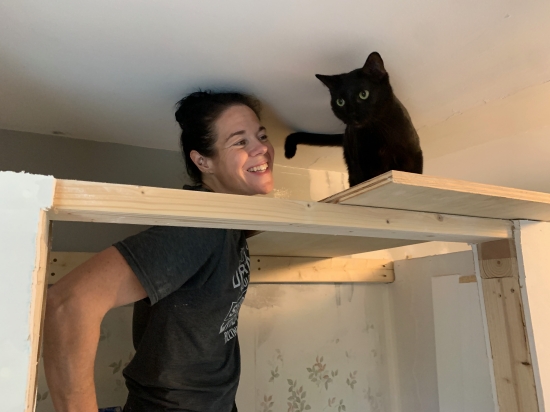 |
| Duck insisted on helping me with the cat hangout. |
 |
| The cat hangout is on top of this closet--I put plywood on the top, drywall on the underside (inside the closet) and then carpet on top of the plywood--for the cats to scratch (it's a scratchy kind of carpet) |
 |
| Cat hangout. Since this photo, I've cut out a hole in that back wall that leads to my bedroom--there are shelves so the cats can climb up and down. I'll show pictures of this in my bedroom reveal. |
I've also made over the bedroom, but I still have to take after photos. I chose the color black for the walls of both the bedroom and bathroom, and I was SO unsure about doing something that drastic, but I absolutely love how it turned out.
The only thing I still need to get done in the bathroom is to install a bifold door on the closet. I wasn't sure if I wanted to, so I've been thinking about it. After seeing these pictures, though, I decided to go ahead and hang it--if only to hide all of the junk we have in there!
I also don't have the clothes hampers in the closet for the "after" pictures--I either need to buy narrower ones so that they fit side by side (no matter how I maneuver them, the pair I have won't both fit under the shelves) or just keep one in there and the other in my closet or other part of the bathroom.
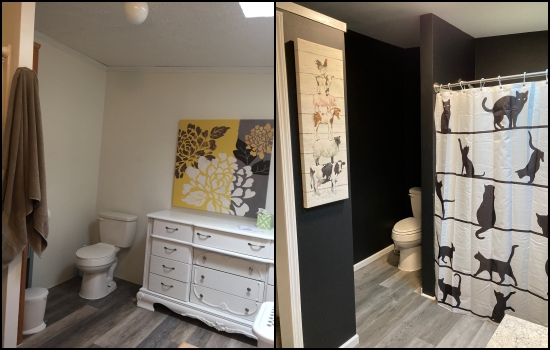
Anyway, here are a few side-by-side pictures that I tried to take from the same angle before and after.
This first side-by-side is only the bathroom BEFORE (in the point of view from the doorway and then opposite the doorway. And this was before-before. I'd since painted it and removed the textured ceiling, painted the vanity, etc. But this is the general idea. (The toilet was to the left of the dresser in the back.)

And here are some from before and now:


This is the vanity before I painted it a few years ago:

And now--everything looks the same, pretty much, except for the wall color!


I can't even describe how much space we've created in our closet by moving the heavier shirts (sweatshirts, sweaters, jackets) to the bathroom closet and hanging them up. In our bedroom closet, we don't have any hangers--I started folding everything after reading Marie Kondo's book. It keeps everything super tidy in there, but the larger items take up so much space! I'll post photos of the closet when I do the photos of the bedroom, too.
Even though this whole thing was a total nightmare that lasted way too long, I'm very happy with how it turned out! The bathroom makes so much more sense now (odd way of putting it, but not sure how else to word it). The black doesn't make everything seem smaller and too dark. The new lights I put in are plenty bright and having the white accents keeps the black from being too claustrophobic.
The cats LOVE their cat hangout on the closet--Chick and Duck can always be found up there when I'm showering--I can see their eyes watching me, hahaha.


Your talents are amazing! I can't imagine what you'd pay to have all of that work done. I LOVE the black! I gotta paint our bathroom (it's painted red now. What was I thinking?) I'm sick of red. I want black, and my boss, I meen husband will hate the idea until he sees it finished. You think it took a long time to do yours, but I think you were really fast, and it's perfect!
ReplyDeleteThis is incredible! I've been following along, of course, but seeing the before and after now, after watching the process as it unfolded, HOLY SMOKES!! And yes. I too thought you were nuts to paint the walls black and it's phenomenal!
ReplyDeleteI am SO impressed you did all this yourself! It looks fantastic.
ReplyDeleteI am so impressed with your skills! I love the color. I've used the peppercorn dark gray color on my lower kitchen cabinets and it's very dark and I LOVE IT! I would have never thought that black walls would look that good, but it actually looks GREAT! Congratulations for a job well done and FINISHED. LOL!!!
ReplyDelete