Do I even need to explain that I've been crazy busy with this renovation, and haven't even opened my computer in days? It's consuming my life right now--drive kids to/from school, coach cross country, and renovate. Not that I'm complaining! It's been fun :)
I wish I had huge updates that were very visible in photos, but it actually doesn't look a whole lot different! Mudding and sanding the seams has taken forever. I had to do three coats of mud, and wait 24 hours between each coat.
First, let's look at mybruises battle wounds. My shins have every shade of bruise in various healing stages, hahaha. This is from standing on the ladder and bracing myself against it--my shins are perfectly centered on the rung above my feet.

Here is what we've done so far:
1) Remove "popcorn" ceiling (it wasn't actually popcorn, but a texture called "stomped"--similar)
2) Scrape it all again, because we didn't do it good enough the first time
3) Repair nicks
4) Mud the seams in the ceiling and the walls (twice)
5) Sand and sand some more
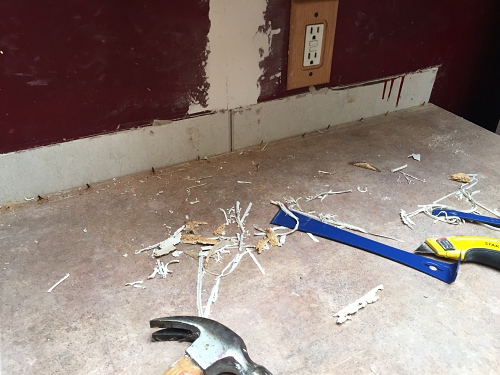
6) Remove laminate backsplash
7) Decide to take down the trim at the ceiling
8) Almost chicken out and put it back up
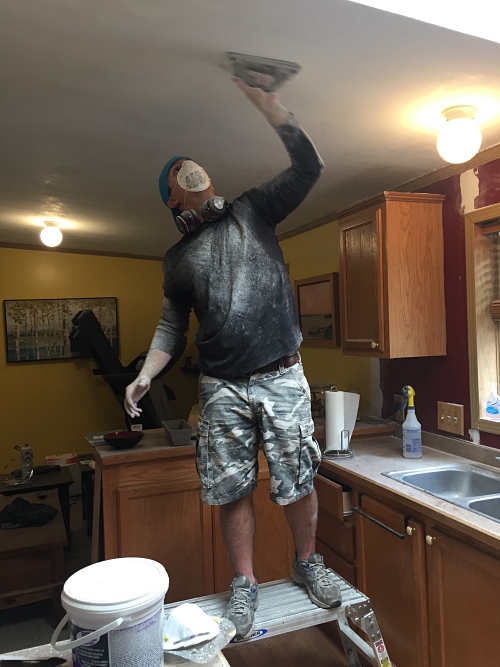
9) Tape, mud, and sand the joint between the ceiling and walls. THREE TIMES.
10) Sand, sand, sand.
11) Prime the ceiling
I'm really happy that I decided to remove the trim from the ceiling. It took a ton of extra work, but I really love how it turned out. And it's a whole lot less trim that I'll have to paint later! ;)
Here is what it looked like before removing the trim...

After I removed it, I was horrified and almost put it back up. But after some research online, I decided to try and tape/mud the joints myself. I figured if it looked terrible afterward, I could always just put some trim up to hide it.

And here is what it looks like after taping/mudding/sanding the seams. I did this to the entire kitchen, dining room, and living room. THAT is why I've been too busy to write!

And in the living room...


Yesterday, we FINALLY got to start priming! We dusted/cleaned the ceilings and then put on one coat of primer. The photo above shows the ceiling after the primer. I think it looks awesome, and we haven't even painted it yet!

On Saturday, I got an email about Sherwin Williams having a 40% off sale on their paint. I couldn't pass that up (when did paint get so expensive?!) so Jerry and I went over our color choices one more time and decided to go get the paint.
I was actually really nervous about it. The cabinets, mostly--I had been planning all along to paint them white. But I really didn't want my kitchen to be plain looking (I clearly love color!) and I went with a color that I never in a million years would have thought I'd pick: blue. Very, very light blue--but still blue. I'm not a fan of blue in any shade, but for some reason, I was really drawn to a light blue/bright orange combo.
Orange is my very favorite color, but I couldn't imagine painting walls or cupboards orange, so it wasn't really on my radar. I had thought about yellow and green for the kitchen, but I didn't really want to carry that over into the living room and dining room (the rooms are so open that they have to coordinate). So, I decided on this:
Living room walls - dark gray
Kitchen and dining room walls - light gray
Cupboards - light blue
Trim (in all rooms) - white
Accents (bar stools, kitchen chairs, skylight) - orange

I love gray, but I didn't want the sterile look of gray and white (my house is very much not "sterile"!)--adding the blue and orange is very much "me".
So, we are finally to the fun part of all this--painting and actually seeing some nice visual progress! Now, I'm going to start on priming the walls...
I wish I had huge updates that were very visible in photos, but it actually doesn't look a whole lot different! Mudding and sanding the seams has taken forever. I had to do three coats of mud, and wait 24 hours between each coat.
First, let's look at my
Here is what we've done so far:
1) Remove "popcorn" ceiling (it wasn't actually popcorn, but a texture called "stomped"--similar)
2) Scrape it all again, because we didn't do it good enough the first time
3) Repair nicks
4) Mud the seams in the ceiling and the walls (twice)
5) Sand and sand some more
6) Remove laminate backsplash
7) Decide to take down the trim at the ceiling
8) Almost chicken out and put it back up
9) Tape, mud, and sand the joint between the ceiling and walls. THREE TIMES.
10) Sand, sand, sand.
11) Prime the ceiling
I'm really happy that I decided to remove the trim from the ceiling. It took a ton of extra work, but I really love how it turned out. And it's a whole lot less trim that I'll have to paint later! ;)
Here is what it looked like before removing the trim...
After I removed it, I was horrified and almost put it back up. But after some research online, I decided to try and tape/mud the joints myself. I figured if it looked terrible afterward, I could always just put some trim up to hide it.
And here is what it looks like after taping/mudding/sanding the seams. I did this to the entire kitchen, dining room, and living room. THAT is why I've been too busy to write!
And in the living room...
Yesterday, we FINALLY got to start priming! We dusted/cleaned the ceilings and then put on one coat of primer. The photo above shows the ceiling after the primer. I think it looks awesome, and we haven't even painted it yet!
On Saturday, I got an email about Sherwin Williams having a 40% off sale on their paint. I couldn't pass that up (when did paint get so expensive?!) so Jerry and I went over our color choices one more time and decided to go get the paint.
I was actually really nervous about it. The cabinets, mostly--I had been planning all along to paint them white. But I really didn't want my kitchen to be plain looking (I clearly love color!) and I went with a color that I never in a million years would have thought I'd pick: blue. Very, very light blue--but still blue. I'm not a fan of blue in any shade, but for some reason, I was really drawn to a light blue/bright orange combo.
Orange is my very favorite color, but I couldn't imagine painting walls or cupboards orange, so it wasn't really on my radar. I had thought about yellow and green for the kitchen, but I didn't really want to carry that over into the living room and dining room (the rooms are so open that they have to coordinate). So, I decided on this:
Living room walls - dark gray
Kitchen and dining room walls - light gray
Cupboards - light blue
Trim (in all rooms) - white
Accents (bar stools, kitchen chairs, skylight) - orange
I love gray, but I didn't want the sterile look of gray and white (my house is very much not "sterile"!)--adding the blue and orange is very much "me".
So, we are finally to the fun part of all this--painting and actually seeing some nice visual progress! Now, I'm going to start on priming the walls...