
I promise to try to get started next week with posting more regularly--the themed posts I mentioned in my last blog post. Now that I've been feeling better, I've been trying to catch up on things that I had lost focus of for a while. It's been nice getting back into the groove, and feeling excited about things again, but I've been busy! I've put the blog on the back burner, but I hope to put more focus on it soon.
I recently made a gift for John and Ric (whose house I stayed at in San Diego) as a thank you for hosting me.
John and Ric host people a lot, and they are truly just the kindest people. A few years ago, their friend broke her leg, and couldn't drive back home to L.A., so she ended up staying with John and Ric for several weeks. She told her mom that she was at the "Sanchez Hulsey Brothers of Mercy Recovery Center" (Sanchez is Ric's last name, and Hulsey is John's). Even though it was a joke, her mom then sent a care package addressed to the recovery center.
Since then, John and Ric "check in" to their house on social media as the "Sanchez Hulsey Brothers of Mercy Recovery Center". And it was very fitting for me, then, when I went there to take a breather from my depression. I literally felt like I was going there to recover--like rehab, but without the addiction part. So, you can see why I made this gift, then:

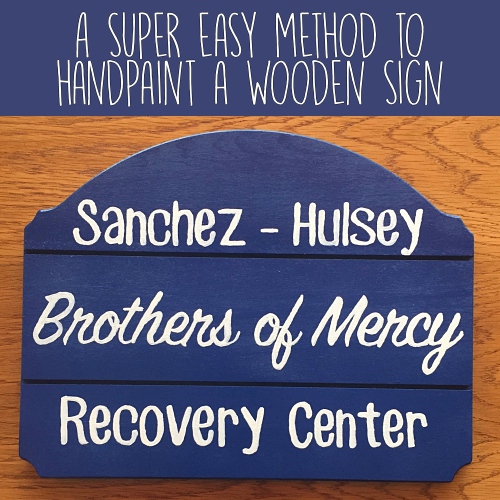
It's just a simple wooden sign that I painted blue and then lettered in "Sanchez Hulsey Brothers of Mercy Recovery Center" with white. I love how it turned out!
Making it wasn't nearly as easy as I'd hoped it would be. My original thought was that I would use stencils and spray paint. But I would have to make a stencil first, which would be the hard part. I watched a couple of YouTube tutorials, and was totally overwhelmed. I bought the stuff to make the stencil, and it wasn't working out very well. First, I had to design it in a Photoshop-like program (I use one called Gimp). I had to adjust it to be just the right size, which was harder than anticipated, because the sign was larger than your average 8.5x11 sheet of paper.
Once I started cutting out the stencil, I had so many problems with it that I just gave up. I started researching ordering a sign online, but I knew it would mean more to John if it was handmade. I looked up how to paint a wood sign on YouTube, and watched several tutorials. I finally decided to try one that seemed really hokey, but I was desperate. And it actually worked!
You need just a few simple things to make it:
First, use the spray paint to paint the entire board. I set my board on a piece of cardboard and brought it outside. I sprayed two coats, and it was dry within minutes.
- Computer and printer (you could freestyle it, but my writing isn't that neat)
- Scissors
- Pencil and sharpener
- Piece of wood for the sign (I bought a plain piece that was shaped already, but not painted or stained or anything like that).
- Spray paint for the background
- Small bottle of acrylic paint for the lettering
- A tiny paintbrush (I had to use a very small one in order to keep the letters from blending together)
- Masking tape, or other gentle tape
First, use the spray paint to paint the entire board. I set my board on a piece of cardboard and brought it outside. I sprayed two coats, and it was dry within minutes.
Next, you need to measure your sign and make a template on the computer. You could use Word or some program like it, but I chose to use Gimp. Design on the computer to make it look how you want it on the sign. When choosing a font, you might want to think about how easy it will be to paint. If there is a ton of very tiny detail, it'll be more difficult than a font like Impact, for example.
Once your template looks how you want it, then print it out. If necessary, you can cut the words out to arrange them on the board. Just make sure you leave enough space around each word to work with.

When it all fits on the board how you want it, turn the papers over and scribble with the pencil all over where the words would be. You don't need to cover the entire back side of the paper; but make sure that the pencil covers the whole back surface of each letter. (You may have to sharpen your pencil a few times). It doesn't have to be dark scribbling--a light touch worked surprisingly well.

Once the backside of the template is covered with pencil, flip it back over and set it on the board in the exact spot that you want it to be. Use a few pieces of masking tape to keep it in place.
When you are done tracing the letters, you can take the papers off of the board. You'll notice that you have the outline of each letter on the board!


I've been excited for John to get it so that I could post about it here. Thankfully, John and Ric really liked it, so I'm happy :)


Well, it looks perfect right at our front door. And we love it!
ReplyDeleteHandmade gifts are the best! You are a thoughtful friend :) the sign turned out great! And the back story is hilarious!
ReplyDeleteIt turned out great!
ReplyDeleteSo fun!! Looks awesome too!
ReplyDeleteYou should start to host parties. Out here "Paint Nights" have become a thing. Paint a picture at a restaurant with a bunch of friends. They are so fun but the new thing is sign painting.
That sounds so much easier than stencils. I did one with stencils and it took me forever! Thank you!
ReplyDeleteI would love to make this project! I'm thinking something like this would be a great addition to my office...
ReplyDeleteDoes it work the same on found wood (like drift wood or old Pallets?)
I don't see why not! In some of the tutorials I watched, they were using old pallets. It would be a fun way to repurpose them!
DeleteThis is so fun! You did such a great job, I would have given up when the stencil creation went downhill. Crafting is great for the mind, isn't it??
ReplyDeleteLove it!! So thoughtful and it turned out great!
ReplyDeleteI love it! I bought a sign for hubs for Valentine's Day that says: "Every love story is beautiful but ours is my favorite" and then our names on the last line. Wish I'd have thought about making it myself but I'm pretty sure I'd have messed it up. Your sign is perfect!
ReplyDeleteIt would have been good form to link to the "hokey" video tutorial that helped you successfully complete your project. Give credit where credit is due and all that. :)
ReplyDeleteThe tutorials themselves weren't hokey (there were several that I watched in order to learn the method)... I just thought the method sounded so odd! That's what I was referring to.
DeleteI did this same technique for some little signs I used at my wedding! I made little plaques and used the stencil technique to transfer it so I could wood burn the letters in!! It's a great trick! Glad you shared it!
ReplyDeleteLove this project and love your blog! Isn't the pencil-transfer method awesome? You might try some sharpie paint pens to fill in the letters for your next project. I think it gives a bit more control and saves time, too! They make fine-tipped that's great for outlining and a medium-tipped that's perfect for filling in!
ReplyDeleteKatie, that's fantastic!!! I never would have figured that technique would work but I kinda want to run to the craft store and make one!
ReplyDeleteOh my gosh, that is so adorable and truly thoughtful!! What an awesome gift :)
ReplyDeleteThis is so adorable I love it!!! And Ive been wanting signs for my house and this gives me a great idea!
ReplyDelete